
Piano students don’t need a lot of accessories to practice… a quality instrument and sheet music is enough! But there are a few tools that make a practice session easier and more effective.
I’m counting down my Top 7 Piano Practice Tools I think every student should have when they are on the bench (plus a bonus one at the end that you might not expect!).
Coming in at number 4 is:
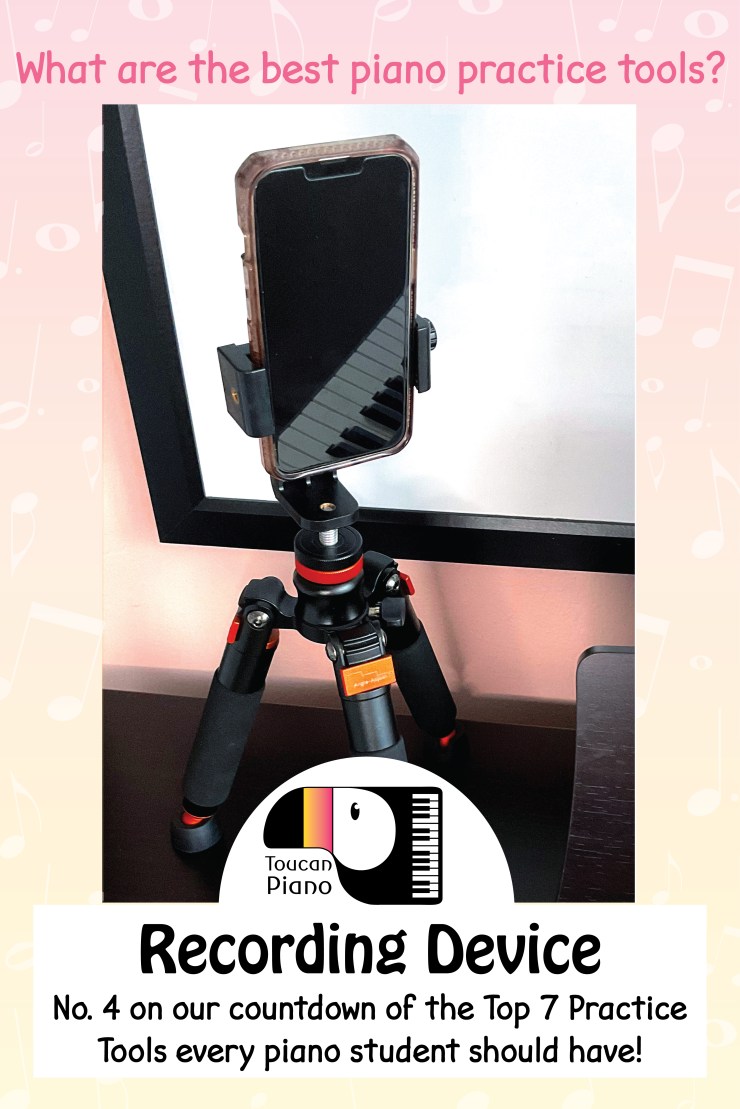
Recording Device
If you caught my No. 5 practice tool blogpost, you know that I said no smartphones and tablets during practice time… the only exception is when you are using them as practice tools! And I DO recommend using a smartphone or tablet because of their ease of use and accessibility.
You might be asking yourself, “I listen to myself when I play, why do I need to record myself too?” The truth is how we listen to ourselves when we play and how we listen to a piece being played are very different.
When we play, our brains are pulled in many different directions… All at once the brain is focusing on the sound being produced, it is managing our movements to produce the sound, it is reading and interpreting the sheet music, it is trying to block out external distractions, and it is managing our inner critic and mental chatter (which can be deafening!). What we hear is often a warped version of reality shaped by our inner world.
When we play, what we hear is often a warped version of reality shaped by our inner world.
Recording ourselves allows us to distance ourselves from the process of making music and gives us a chance to hear what an audience would hear. It helps us gain a more realistic view of our playing and it helps us zone in on parts of our music that need the most TLC (tender loving care).
When it comes to recording our practicing, we first have to think about what we want to learn from the recording. Are we trying to identify passages that need more work? Are we listening for particular details, such as articulations or dynamics? Are we trying to figure out the proper amount of pedaling for a piece? Are we preparing for a performance? The answers to our questions will determine if we can get by with doing a simple audio recording or if we need to do a video.
Answering these questions will also determine the amount of equipment we will need to set up around the piano. As a rule of thumb, I say the simpler the better. We are using the recording as a tool for our practicing. Practice time is precious. If the goal of the recording is to upload it to social media or YouTube as a polished final product, that is not practicing and a different time should be scheduled to do a nice recording of your work.
Keep your recording set up simple. Practice time is precious. Remember, it’s practice, not a polished final product.
Audio Recording and Set-Up
This is the simplest and most time efficient way to record yourself during practice. As musicians our ultimate concern is the quality and beauty of the sound we are producing from our instruments. The best way to focus our attention on this is through an audio recording.
We live in a time where recording is accessible to pretty much everyone and tremendously easy to accomplish. Most people have some sort of smartphone or tablet (even children). Making an audio recording can be as simple as opening the Voice Memo app or camera on the device, hitting record, and placing the device on the bench next to you.

If you own a digital piano, doing an audio recording is even simpler, since digital pianos have a record button built into them. You can also connect them directly to a smartphone or tablet and record yourself using apps such as GarageBand (check out my blogpost on how to set up GarageBand for recording from your digital piano). You may need adapters to connect your device to your piano, so remember to check your connection ports.
Here are a few things to try out when using an audio recording during practice:
1. Use a Recording to Measure your Progress
- Record yourself at the beginning of your practice week.
- Save it but don’t listen to it.
- Continue with your regular practice schedule throughout the week.
- At the end of your practice week, record yourself again.
- Listen to both your recordings, starting with the first one from the beginning of the week.
- Listen for areas where you improved. It’s important to look for the good first to give yourself some encouragement.
- Look for areas that could benefit from additional practicing. Make notes in your score or practice journal along with ideas on how to fix them.

2. Use a Recording to Solve Problems
- Find a section in your music that is giving you trouble.
- Record yourself playing that section.
- Listen to your recording and ask yourself what needs to be improved (rhythm, phrasing, dynamics, etc.).
- In your practice journal, list out different solutions you could try to fix the problem passage.
- Work on the first solution from your list. Once you have played it a few times, record yourself.
- Compare it to the original recording. What was better or worse this time around? Write your observations down in your practice journal.
- Try out the next solution from your list and repeat the procedure above.
This is a very methodical way of practicing that can bear tremendous fruit and inspire a lot of creative problem solving.
3. Use a Recording for Deep Listening and Refining a Piece
This type of recording can be used when preparing a piece for performance.
- Record yourself playing as if you are performing for an audience. Your focus should be on the overall flow and musicality of the piece. Allow your inner critic to take a break and play in the moment.
- Listen back on your recording and look for spots in the music that could use additional refining. Do you remember what you were thinking during those moments? Did you lose focus? Did your mind wander away from the music? Were you worried about an upcoming difficult passage? Write your thoughts down in your practice journal.

Don’t be overly critical of yourself (we tend to expect a lot from ourselves and as a consequence we can beat ourselves up over the littlest things). Imagine you are listening to a dear friend play and not yourself. Give yourself the type of feedback you would give a friend.
Don’t be overly critical of yourself. Give yourself the type of feedback you would give a friend.
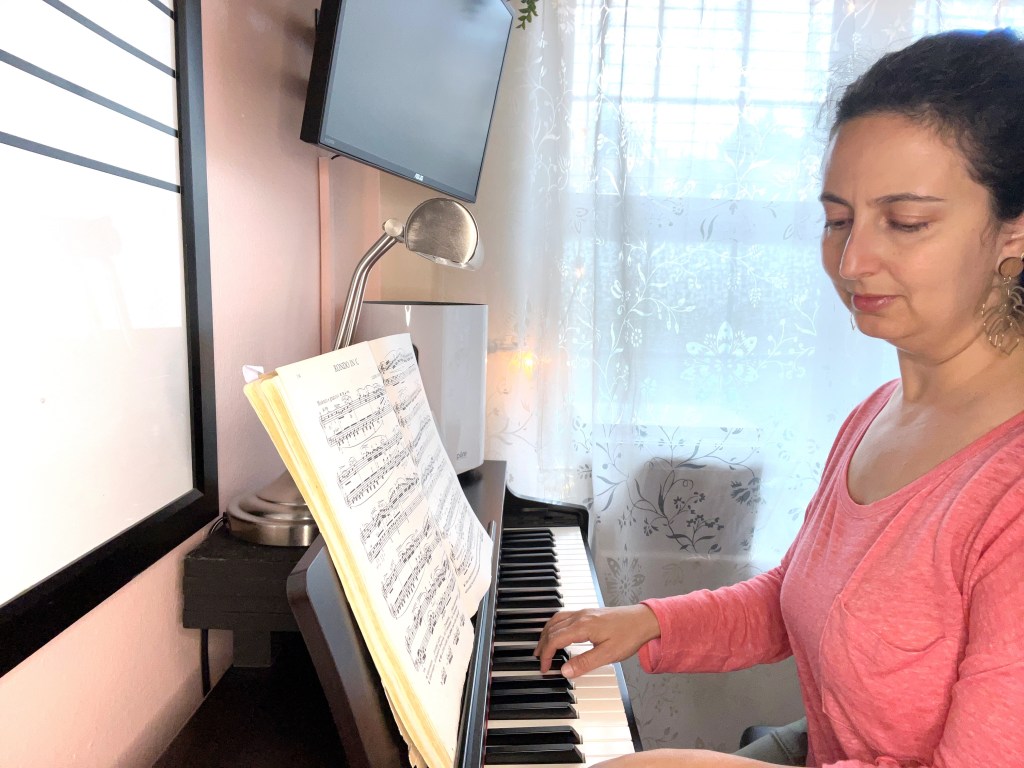
Video Recording and Set-Up
Video recording is also a useful way of gaining insight into our playing. With videos we can focus more on the physical movements we make when we play, technique and posture, and presence at the instrument (if we are preparing for a performance). With a video recording we are looking for feedback that sound alone cannot give us.
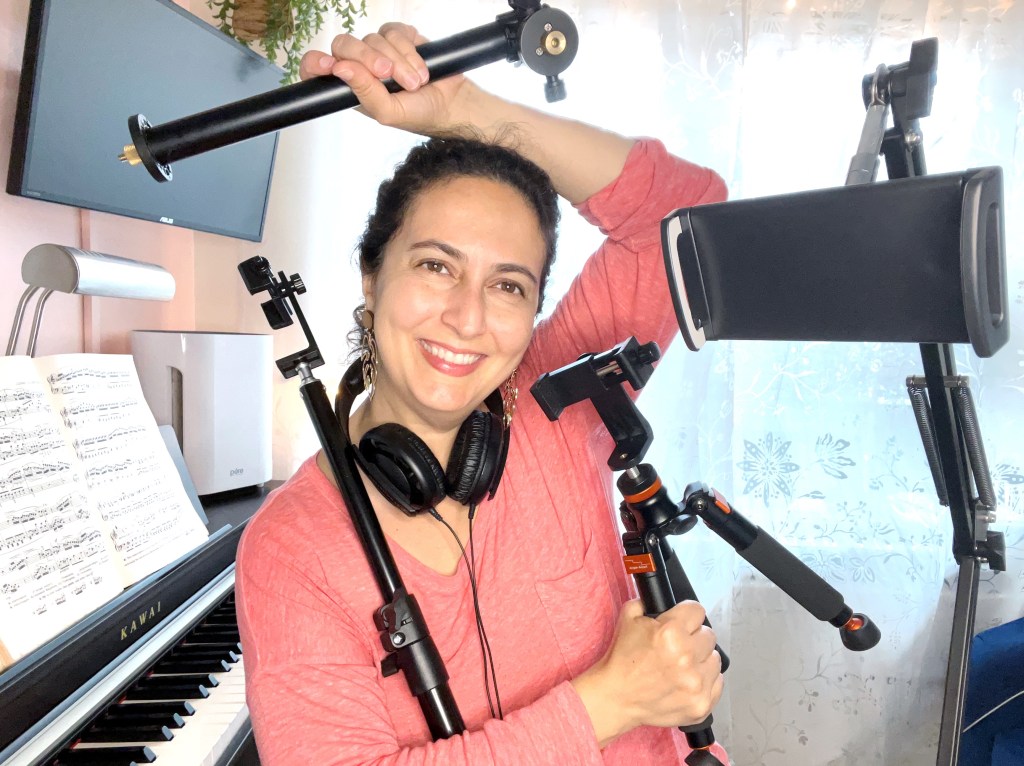
A video recording can be as simple as propping a smartphone up against the piano or a pile of books. But depending on what we want to focus on with our video recording, we may need additional equipment in order to get the right angle.
For side or back views, we can use a tabletop tripod:
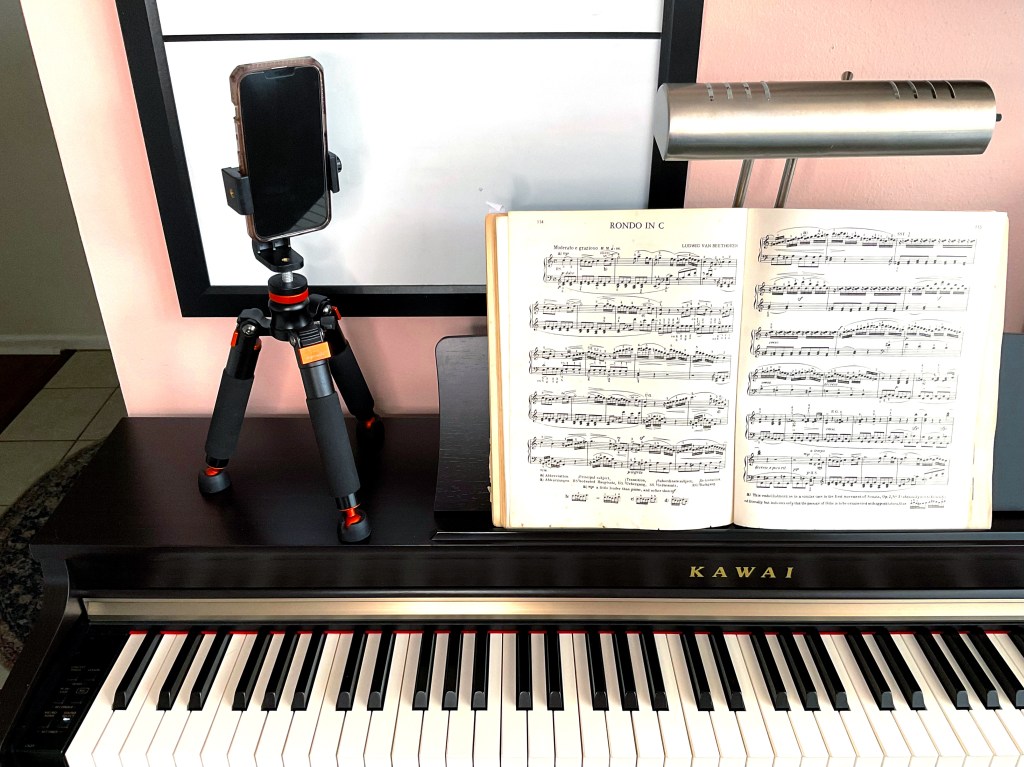
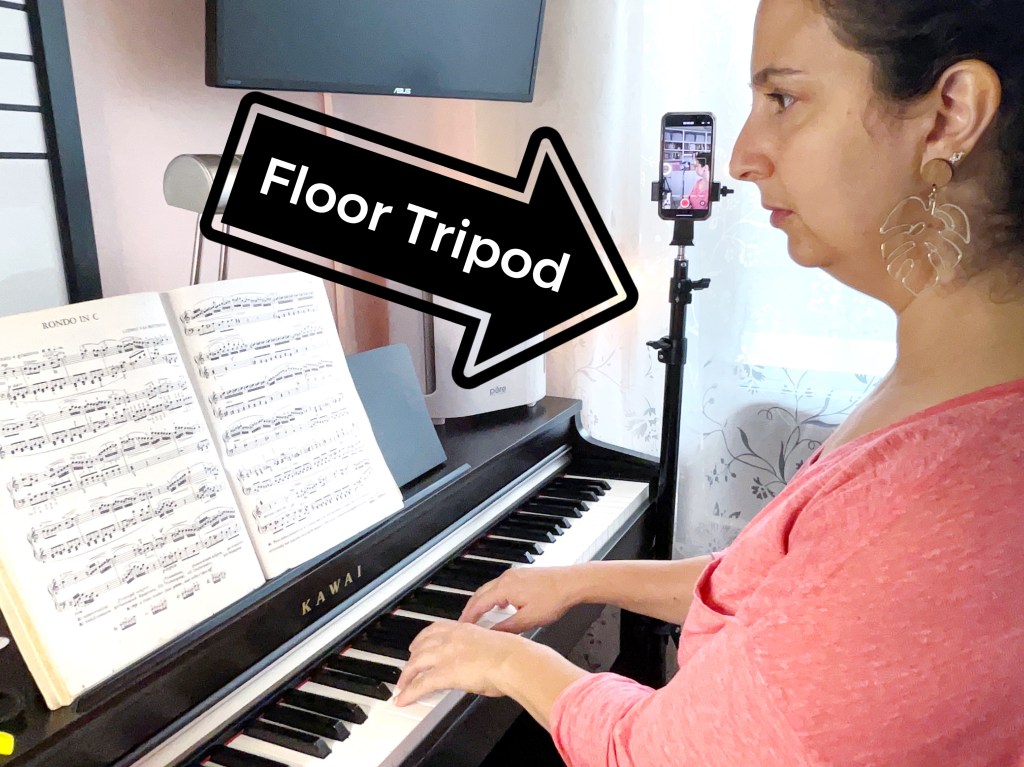
Or a floor tripod (this is the one I use for my smartphone and this is the one I use for my tablet):

For an aerial view of the hands and keyboard, an extension arm can be attached to the floor tripod:
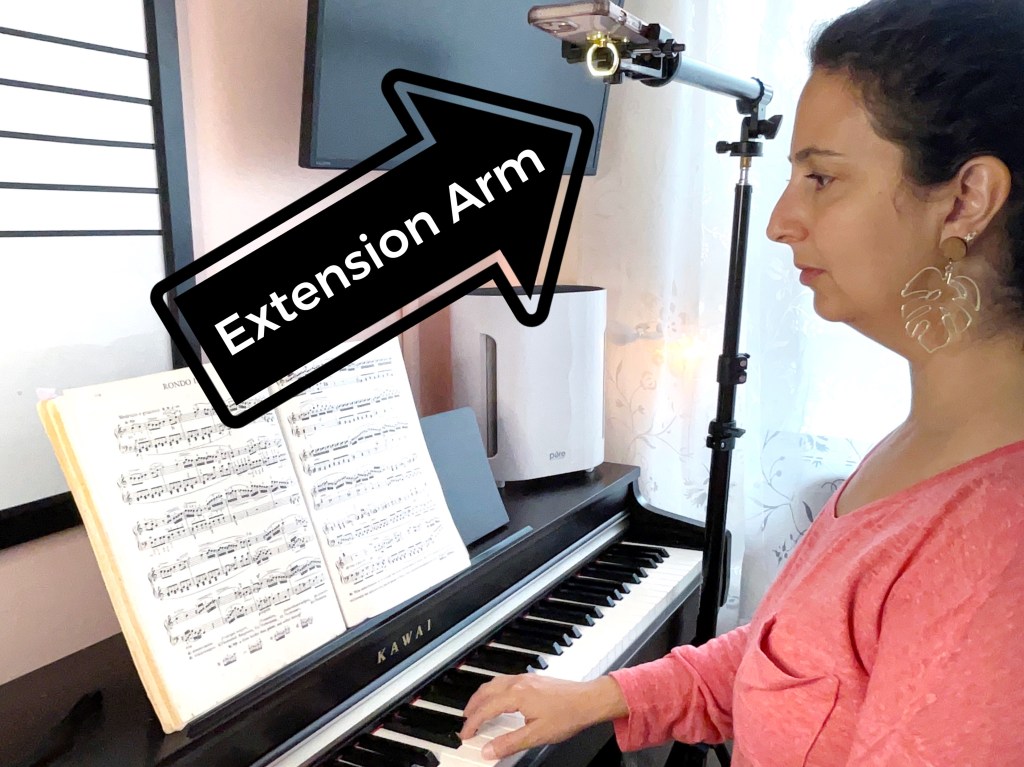
You will also need an adjustable smartphone holder for the tabletop tripod. For the set-up with the floor tripod and the extension arm, you will also need screw adapters.
Just a reminder, keep it simple! Only set up what you need to answer your questions. It’s very easy to fall down the rabbit hole when it comes to recording equipment. But remember that this is practice, not content creation. You can certainly use the same equipment for content creation (I do!), but set up just enough to get the job done.
Here are a few things to try out when using a video recording during practice:
1. Use a Video Recording to Check your Posture
Proper posture is SO crucial to avoiding injury and discomfort when playing (especially for extended periods of time). Oftentimes we will feel pain or discomfort in a part of our bodies but not be able to pinpoint what it is we are doing to cause the pain (our minds are so focused on the playing and certain things just go into autopilot because of force of habit).
- Set up your video recording equipment in a way that focuses on the area of your body that your are concerned about.
- Play your piece.
- Watch the recording back and look for misalignments, drooping, leaning, arching, etc. in your posture.
- Ask yourself if these in posture failures occur throughout the entire piece or only during certain passages?
- If they occur throughout the entire piece, select several moments in your piece where you can remind yourself to check in with your body. Write these reminders into your score (it can be as simple as a red ‘X’ – you will know what the symbol means).
- If they occur only during certain passages, ask yourself if this is a posture problem or a technical problem. If you suspect a technical problem, try recording a video to focus on your technique during that passage. If it is a posture problem, correct your alignment as necessary and consciously work on relaxing during the passage.
2. Use a Video Recording to Work on Technique
Video recordings can be an invaluable tool when a student is working on a new technique or trying to investigate why a passage is not working. The video can also be sent to the student’s teacher or taken to their lesson to get suggestions on how to fix their technical problems.
- Set up your video recording equipment to focus on your hands, wrists and arms (select a vantage point that best suits your needs).
- Play the passage that is giving you trouble.
- Watch the recording back.
- Identify where the problem is happening (it can be in the lead up to the passage or something in the passage itself).
- Look for technical issues that are making the passage difficult to play.

Some questions to ask yourself as you watch the video:
- Are your fingers, wrists, and arms working together?
- Are your motions fluid or stiff?
- What is causing the tension? For example, your fingers need to stretch too far so you stiffen your wrist and arm; the fingering is awkward, so your elbow juts out and away from your body causing your fingers to become misaligned with the keys; your arpeggios sound stiff because you are losing your wrist rotation as you get further into the passage; your wrist is dipping making the passing of your thumb difficult to manage, etc.
3. Use a Video Recording to Practice for a Performance
- Set up your video recording equipment from the vantage point of your audience.
- Hit the record button.
- Practice approaching the piano from the same direction you will on the day of the performance.
- Take a bow to greet your audience.
- Sit on the bench and prepare your mind to begin playing.
- Play your piece.
- Get up from the bench and take a deep bow (check out my blog post on how to bow after a performance)
- Exit the “stage” in the same direction you will go on the day of the performance.
- Bonus: Up the stakes and send the video to family members and friends.
Having a video camera pointed at us when we play gives us the sensation of being watched. It’s a great way to recreate some of the performance jitters we all feel when playing in front of an audience. AND if we keep in mind that the video we will be shared with friends and family, it will add a whole other layer of butterflies to our stomachs, because then we know that other people will actually see it.
And there we have it!
The number 4 practice tool every piano student should have. Be sure to check out the previous blogposts for other great practice tools that made my list:
Next up is the Number 3 Practice Tool for effective practicing!

- Compose a Ringtone
Ringtones are helpful but what if we could make them special too?! This is a fun and quick project that even the most reluctant students can get behind. - I Can Heart-ly Wait for the Punchline
A heart themed laugh-out-loud note reading game. I love this game because not only do students have to think about keyboard geography, they also have to be able to associate the notes with their exact location on the piano. - Chord Snowblast
Build chords and collect points while trying to avoid the snow blast! Kids will test their knowledge of building chords AND they will actually be hoping to get all the chords with sharps and flats!!

Let’s stay in touch, join the list!
As a “toucan” of our appreciation download a free set of note flashcards (link in our Welcome email)!
We are a participant in the Amazon Services LLC Associates Program, an affiliate advertising program designed to provide a means for sites to earn advertising fees by advertising and linking to Amazon.com. As an Amazon Associate we earn from qualifying purchases.

[…] #4 Recording device […]
LikeLike
[…] #4 Recording Device […]
LikeLike
[…] #4 Recording Device […]
LikeLike
[…] #4 Recording Device […]
LikeLike
[…] Top Practice Tools Every Piano Student should Have: #4 Recording DeviceWhen used strategically, a recording device can help students gain valuable insight into their playing and progress faster! I’m sharing my favorite recording equipment and different ways students can use recording themselves as a practice tool to improve their playing. […]
LikeLike