Plastic Egg Music Notes

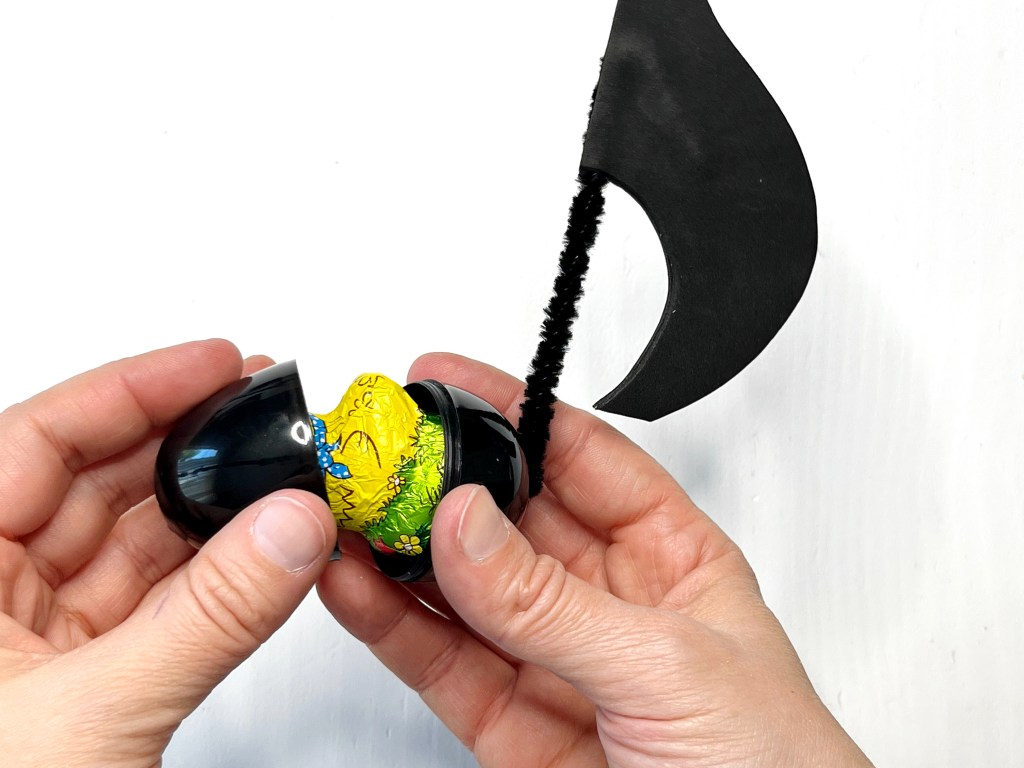
I recently came up with the idea of making music notes out of plastic eggs. I made them as Easter gifts for my students (I put a few pieces of chocolate and candy inside each one). They all loved them! And they were super affordable to make (which is important when you have a lot of students!).

I ended up having so much fun making them, I not only made one for each of my students but also made a bunch for myself. And that’s because my mind was swimming with ideas on a variety of different ways to use them:

  • gifts for students as they head off for summer vacation
  • music teacher gift (make some for your child’s school music teacher and fill them goodies!)
  • music theory games (more on that is a future post!)
  • kid’s craft for a music-themed summer camp
  • decorations for your piano studio or music room

There are so many possibilities! And bonus… they are SO easy to make. Here is a video showing the whole process:

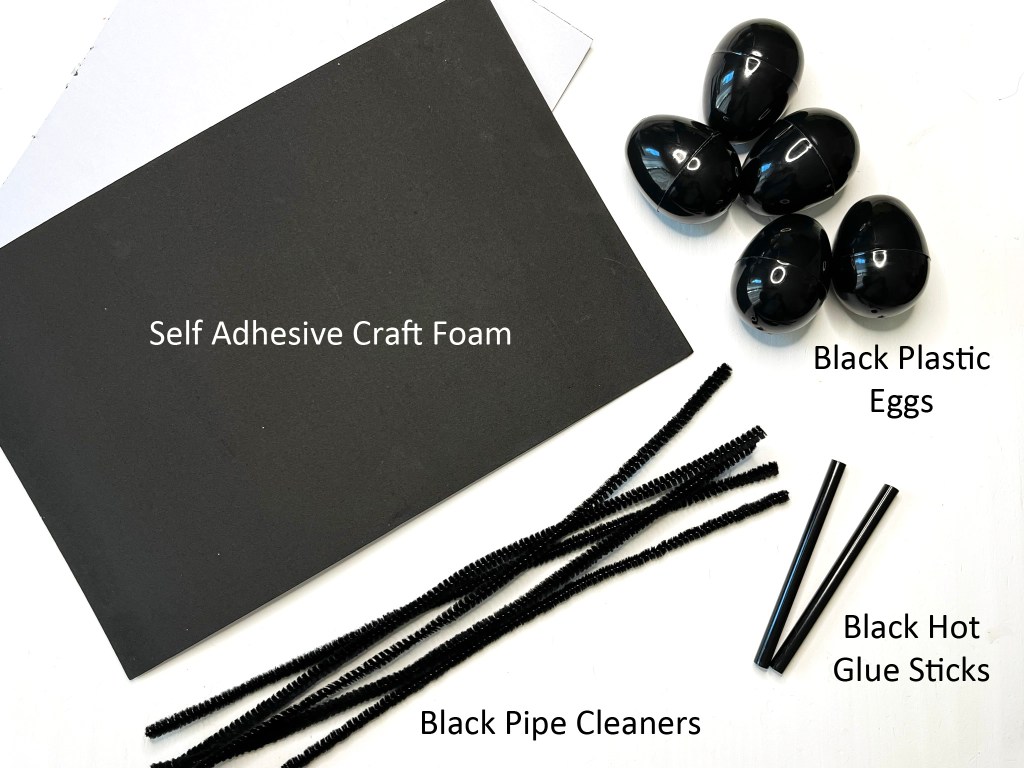
To make your own plastic egg music notes, you will need:

Black self adhesive craft foam sheets, five black plastic eggs, a bunch of black pipe cleaners, and two stick of black hot glue sit on a white table.

Whatever plastic eggs you decide to use (I think colorfully ones would be so adorable, too!), remember to look for plastic eggs that have two holes in the bottom (the wider half of the egg).

Hands hold the halves of a black plastic egg

Fold one of the pipe cleaners in half and thread the two ends of the pipe cleaner through the holes in the bottom half of the plastic egg. Make sure to start on the inside of the egg so the ends of the pipe cleaner are on the outside of the egg.

A black pipe cleaner has been bent in half and a hand points to the bend.
A black pipe cleaner is threaded through the holes in the bottom of a black plastic egg

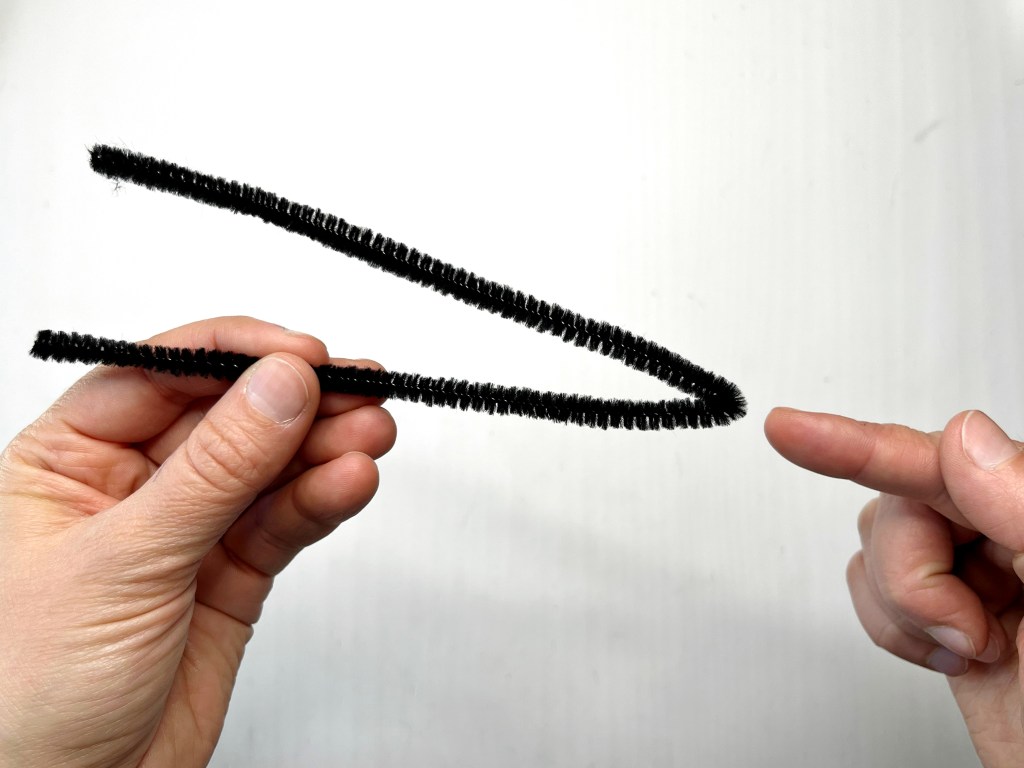
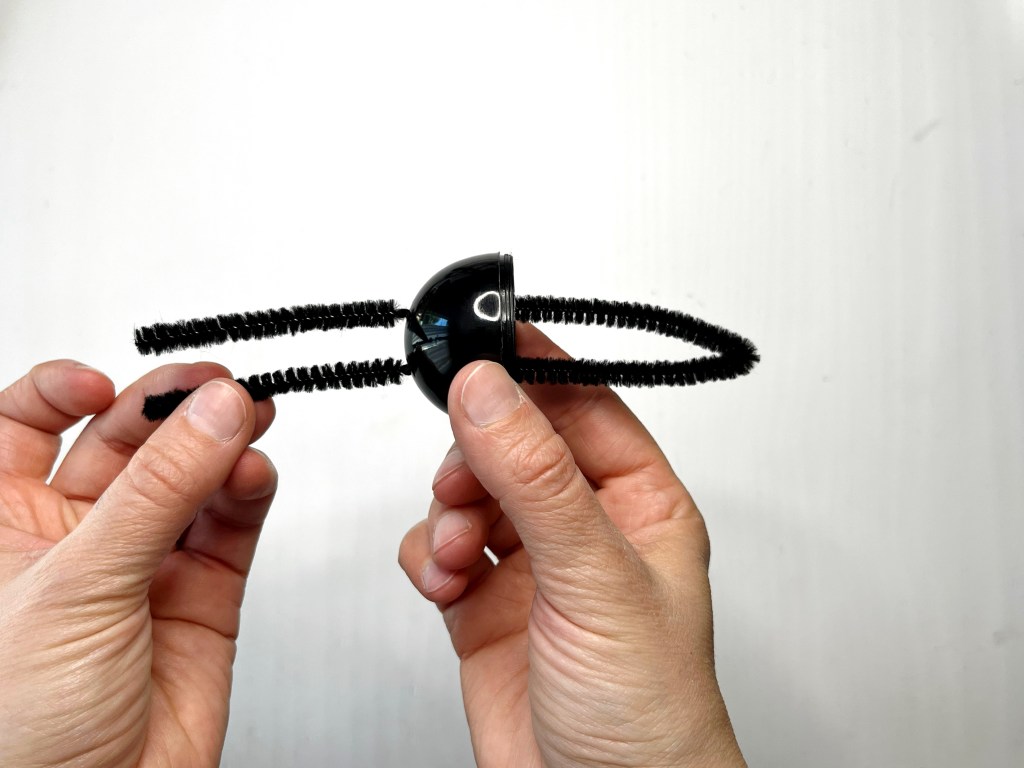
Pull the ends of the pipe cleaner through and twist them tightly against the egg. You may want to push the pipe cleaner on the inside of the egg so that it is flush on the inner wall of the egg.

Then twist the two ends of the pipe cleaner together from the base of the egg all the way up to the ends of the pipe cleaner.

A black pipe cleaner is twisted to the bottom of a black plastic egg
Half of black plastic egg is held up to show how a black pipe cleaner was attached to the end of the egg

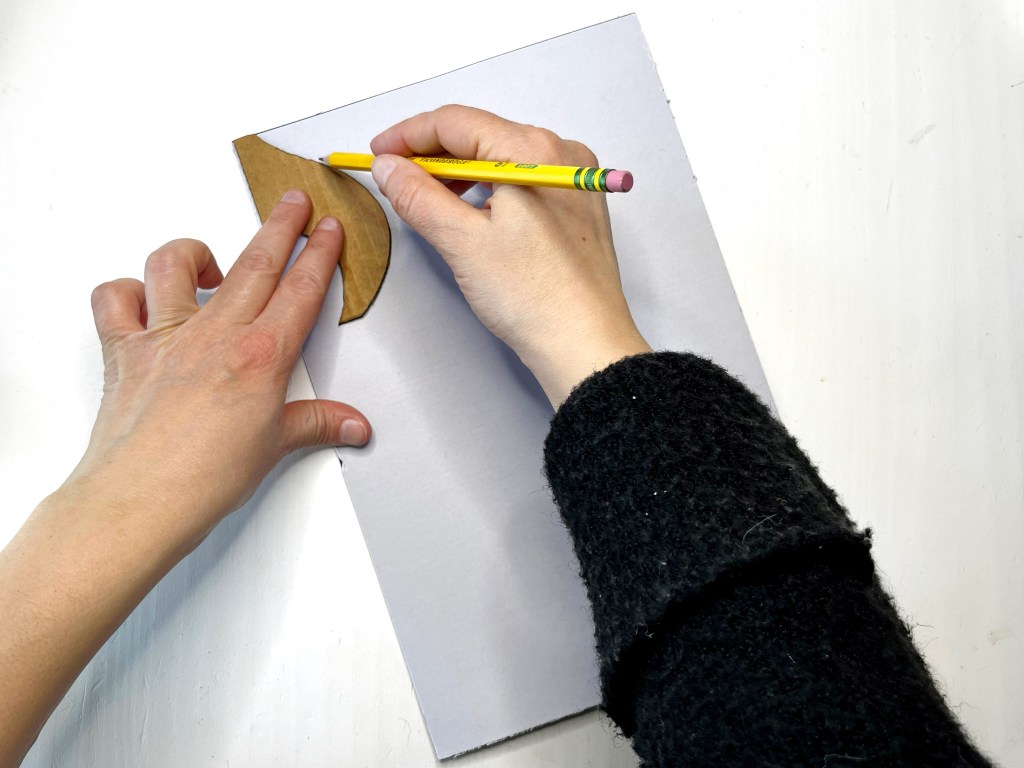
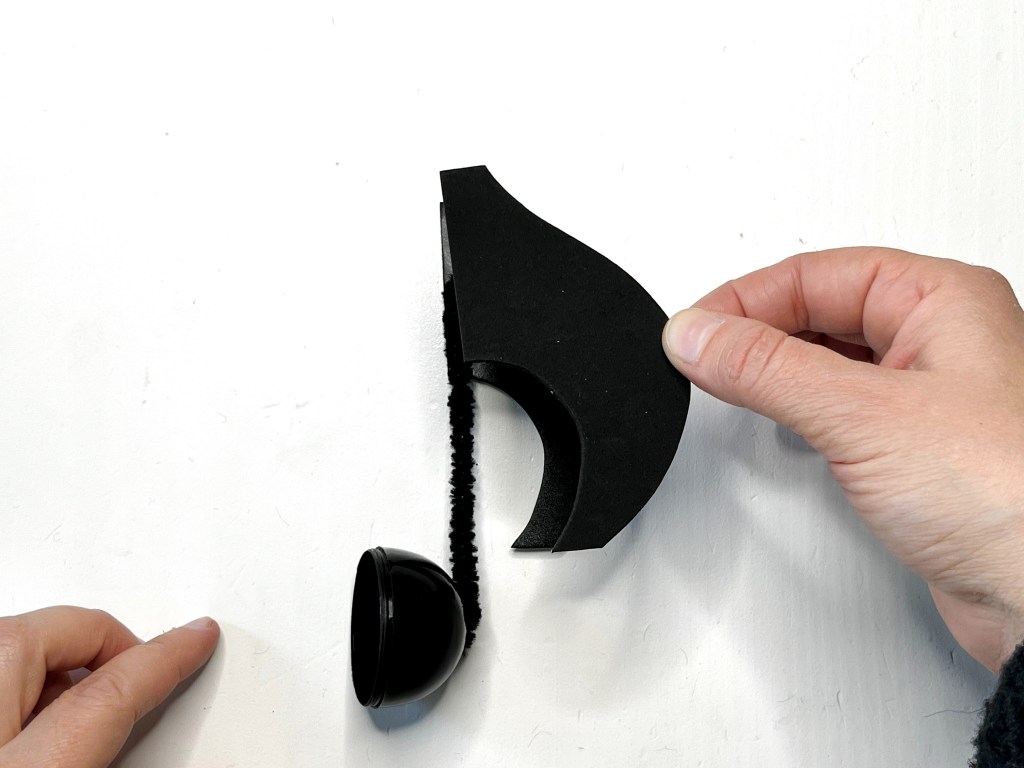
Since I was making a bunch of music notes, I made an eighth note flag stencil out of cardboard. I traced the flag onto the back of self-adhesive craft foam. Then I flipped the stencil over to get a mirrored image of the flag and traced the flag again. I was able to stencil 12 flags onto a single sheet of self-adhesive craft foam.

Hands trace an eighth note flag cardboard stencil onto the backing of a sheet of self-adhesive craft foam
Hands trace a second eighth note flag cardboard stencil onto the backing of a sheet of self-adhesive craft foam

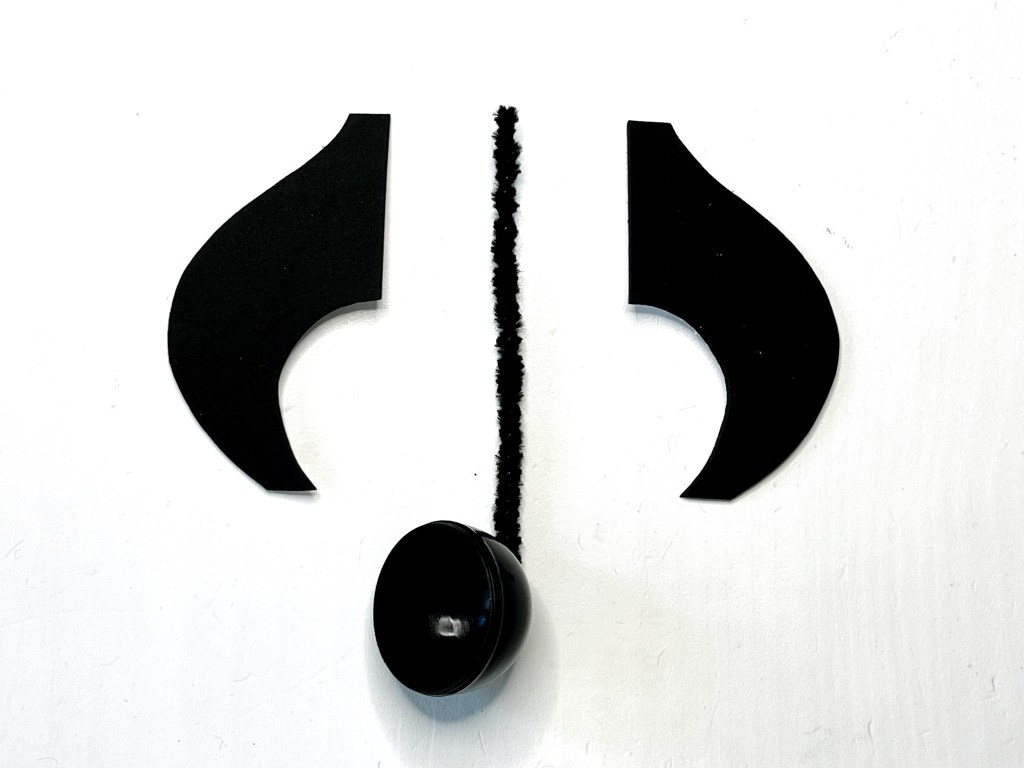
Cut out the flags. It is now time to assemble the three parts of the music note!

Half of a black plastic egg with a black pipe cleaner attached to it sit between two black eighth note flags made of self-adhesive craft foam

Bend the pipe cleaner about an inch from the top. This will provide a secure connection point for the craft foam.

Hands bend a black pipe cleaner

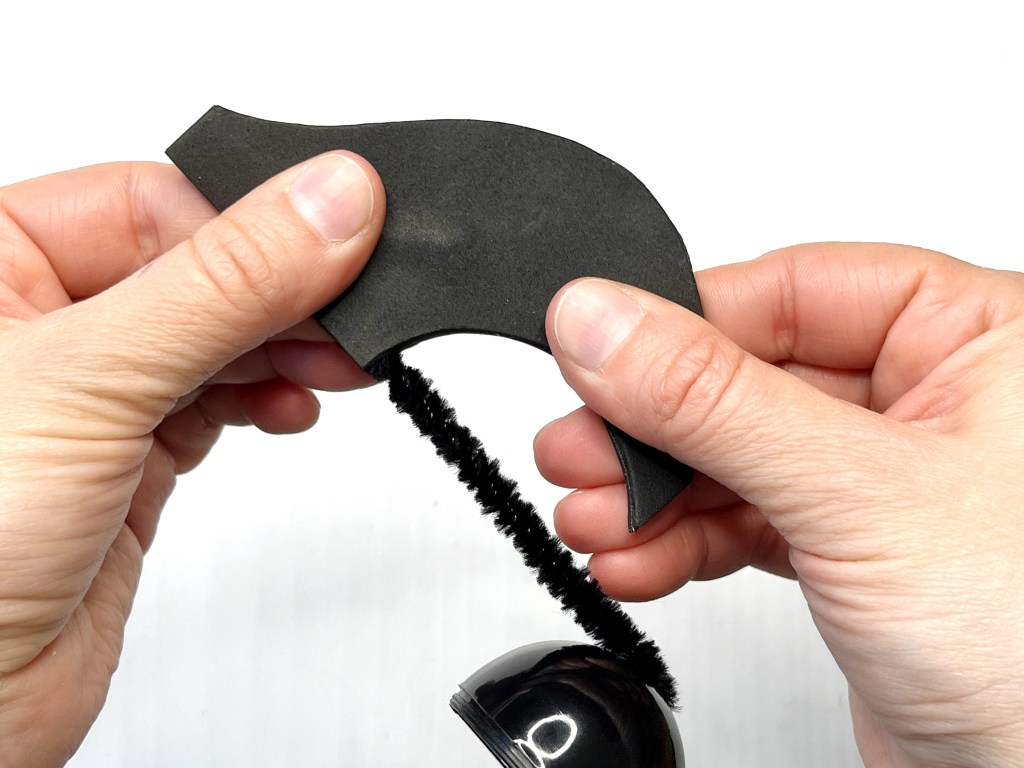
Peel back the paper backing from one of the craft foam flags. Press the bended end of the pipe cleaner against the sticky side of the craft foam. Make sure that the stem of the note is along the edge of the flag but still sticking to the flag.

Hand peels the white paper backing off of black self adhesive craft foam
A pipe cleaner is placed on the sticky side of black self adhesive craft foam

Remove the backing of the second craft foam flag and carefully lay the sticky side of the flag carefully onto the sticky side of the first flag. The pipe cleaner should be sandwiched between the two craft foam flags. Be careful when sticking the flags together… the adhesive is very sticky and once they touch, you cannot pull them apart without ripping the craft foam.

Hand peels the white paper backing off of a second black self adhesive craft foam
Two black self adhesive craft foam eighth note flags are glued together.

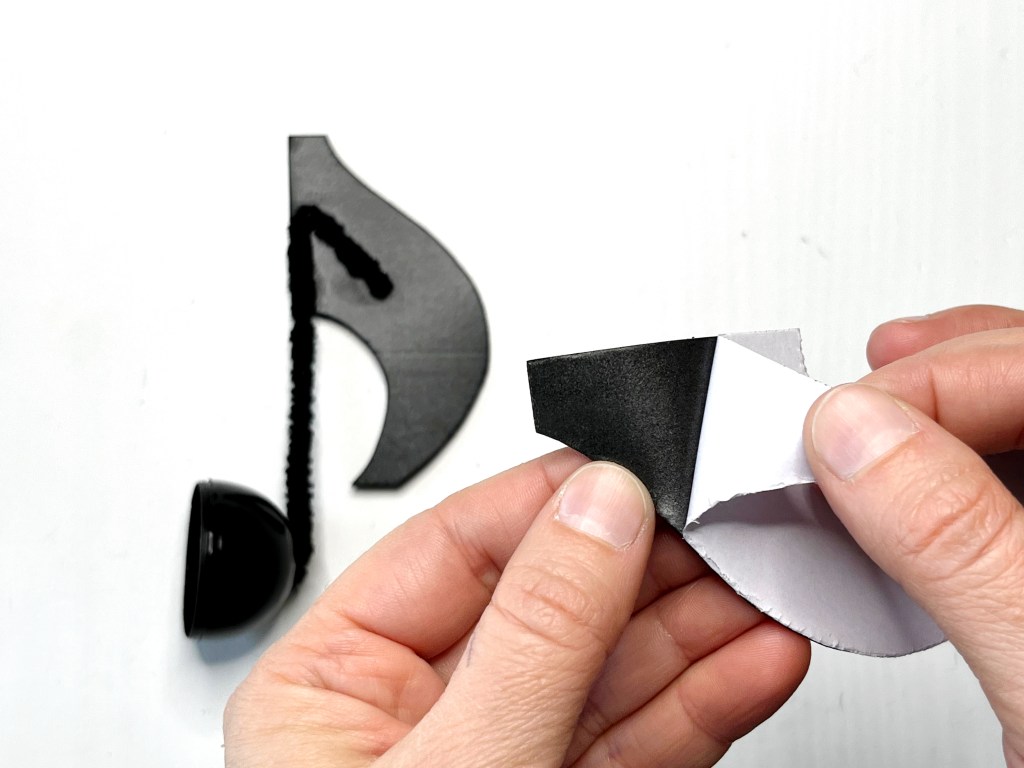
Press the flags together to secure everything together.

Hands press together two pieces of black self adhesive craft foam

This part is optional but if you plan to use the plastic egg music notes for games or as decorations, I would strongly suggest adding this step. My experience is that the craft foam tends to separate over time. It will hold together in the short term, but over time the craft foam flags will have to be pressed together again on occasion.

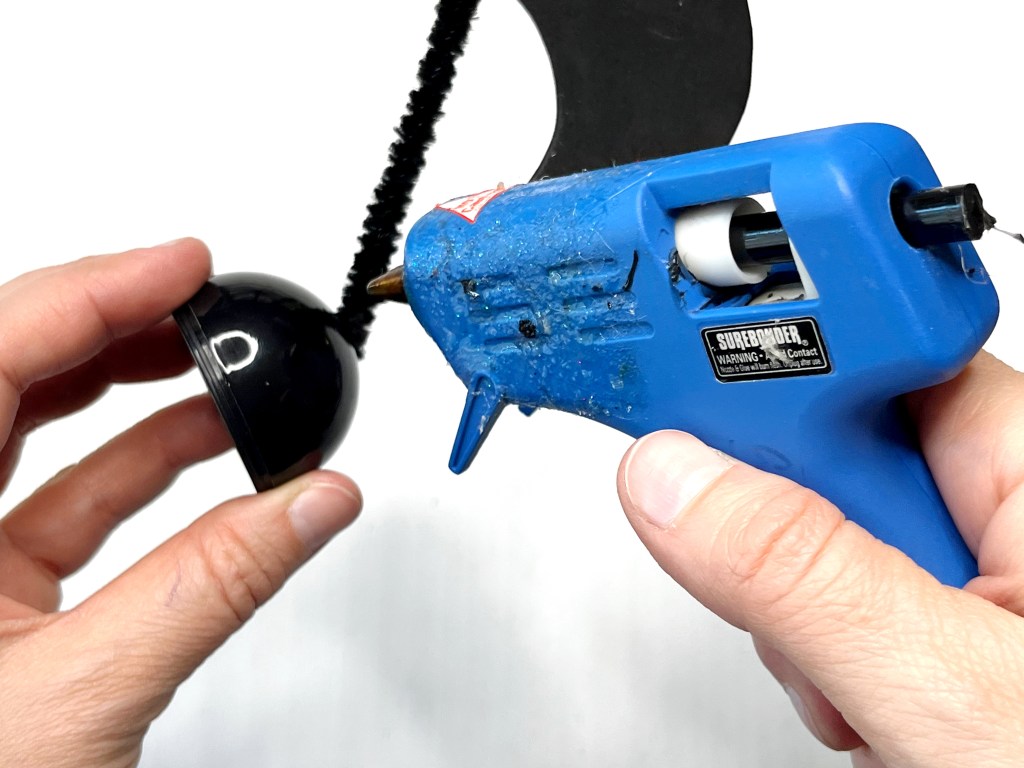
In order to make everything hold together in the long term, I suggest running some hot glue along the seams of the craft foam flags (at the edges where the two flags meet).

I also like to add a dot of hot glue at the base of the stem, where the pipe cleaner exits the holes of the egg, to help the stem stand up straight. The stem will usually stand up straight with a little adjusting, but the glue gives it a little extra support.

A hot glue gun loaded with a black hot glue stick applies glue to the edges of the plastic egg music note
A hot glue gun loaded with a black hot glue stick applies glue to the base of the plastic egg music note

The plastic egg music note is all done and ready to be filled with some treats!!!
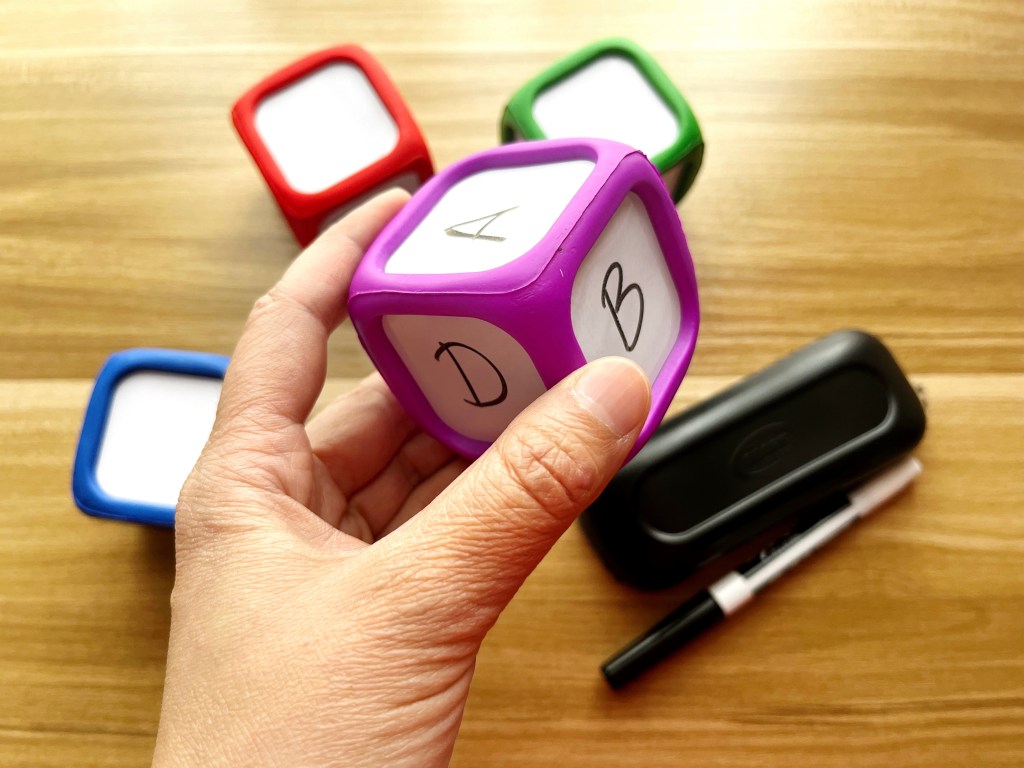
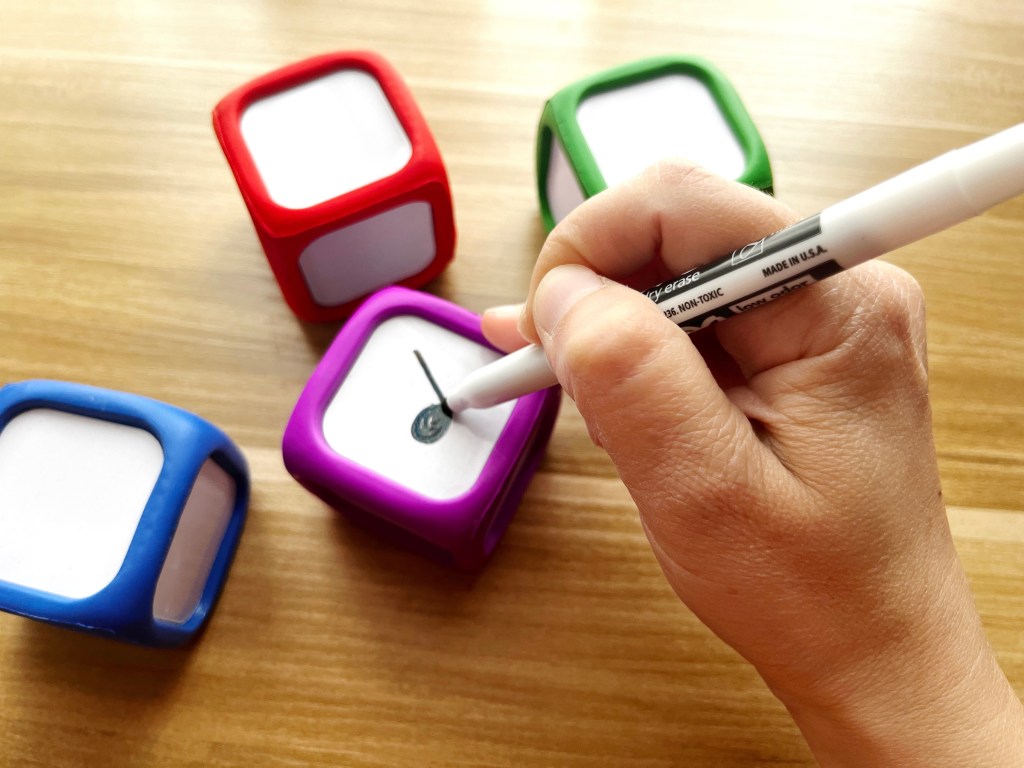
A plastic egg music note is loaded up with a piece of chocolate

Explore more creative teaching ideas
  • The Die of Destiny
    Sometimes  a student will walk into my studio without their usual bounce in their step. I’ve found that a little silliness and a dash of chance gets them in the mood to pull out their piano books and play music. The Die of Destiny is a fun and quick lesson starter to get students playing.
  • Compose a Ringtone
    Ringtones are helpful but what if we could make them special too?! This is a fun and quick project that even the most reluctant students can get behind.
  • Two Sides of the Same Coin
    A game about enharmonics that can be played in several different ways! Students will try to collect the most enharmonic pairs and hope that their coins don’t get stolen by another player.

Let’s stay in touch, join the list!

As a “toucan” of our appreciation download a free set of note flashcards (link in our Welcome email)!

Processing…
Success! You're on the list.

We are a participant in the Amazon Services LLC Associates Program, an affiliate advertising program designed to provide a means for sites to earn advertising fees by advertising and linking to Amazon.com. As an Amazon Associate we earn from qualifying purchases.

How to Make your Own Music Theory Dice

Music Theory dice are a great tool to have in your piano teacher arsenal! They can be used for a variety of activities within a lesson, including:

  • Review music theory concepts
  • Play music theory games
  • Test your student’s knowledge on a specific concept
  • Propose challenges for a student
  • Compose

There are many pre-made options available on the market but I love the flexibility of a DIY set of music theory dice. I can cater them to a specific game and I can cover WAY more concepts (there may not always be pre-made dice available for what I would like to work on with my students).

I’m going to share two different dice you could try out: one is a reusable option and the other is a semi-permanent solution which can be used over over again (but can always be changed up if you’d like).

Reusable Music Theory Dice

The reusable option is a dry-erase die which can be easily used over and over again for whatever concept you with to work on with your students.

Hand holding a purple dry erase die with the letters A, B and D written on its sides in black marker. In the background are three other dice (a red one, a blue one and a green one) along with a dry-erase marker and eraser.

I especially like this particular dry-erase dice set because the whiteboard of the dice is lower and therefore protected by the colored elevated borders. This keeps what is written on the whiteboard from being rubbed off when the dice are rolled and also gives kids a good place to hold the dice so their fingers don’t erase the text.

A hand holds a black dry-erase marker. It is drawing a quarter note on a purple dry-erase die. Three other dice sit in the background, a blue one, a red one, and a green one.

They are also great for younger kids since they are bigger and easy for them to handle.

Semi-Permanent Music Theory Dice

This is an excellent option for things you would like to use over and over again. I use these blank dice and labels.

15 blank white dice sit on a lighten wood table along with a page of 2 inch by 4 inch white labels.

I just write (or print out) the concept I want to drill on the label, cut it down to size, and stick it to the blank die. You can use a single label to cover all the sides of a die… and still have a lot leftover to use later.

Three pictures show the process of creating a music theory die. The first step shows a hand drawing a quarter note in black pen on a white label. The second step shows scissors cutting out the quarter note. The third step is to stick the label with the quarter note onto the blank die.

If I plan to use the die a lot, I also apply a layer of Mod Podge to protect the labels.

A hand holding a paint brush is applying a layer of Mod Podge sealant to the surface of a die.

If I ever need to change out the concept, it’s just a matter of peeling the label off the die.

With the dice all ready to go, it’s game time!!

Explore more creative teaching ideas
  • The Die of Destiny
    Speaking of dice, the Die of Destiny is a fun lesson starter when a student walks into my studio without their usual bounce in their step. I’ve found that a little silliness and a dash of chance gets them in the mood to pull out their piano books and play music!
  • Sky High Love
    Whose tower will remain standing in the end?!
    This adrenaline-inducing rhythm game is a great game to play with a homemade set of rhythm dice (just replace the rhythm sticks with dice!). AND it’s a great way to kick-off a lesson and get the energy up.

Let’s stay in touch, join the list!

As a “toucan” of our appreciation download a free set of note flashcards (link in our Welcome email)!

Processing…
Success! You're on the list.

We are a participant in the Amazon Services LLC Associates Program, an affiliate advertising program designed to provide a means for sites to earn advertising fees by advertising and linking to Amazon.com. As an Amazon Associate we earn from qualifying purchases.