Nailing Piano Technique: The Fingernail Dilemma

If you mention fingernails to any piano teacher, you will be greeted by exasperated sighs, rolling eyes, and a myriad of strong emotions. This is because piano teachers across the board share a very complicated relationship with this seemingly innocent part of the hand…

Piano student holds out hands to display their beautiful, Christmas-themed fake nails.

You may hear stories about teachers keeping fingernail clippers on their piano to clip their students’ fingernails if they are too long. Or of a piano teacher who sends students home because of their nails.

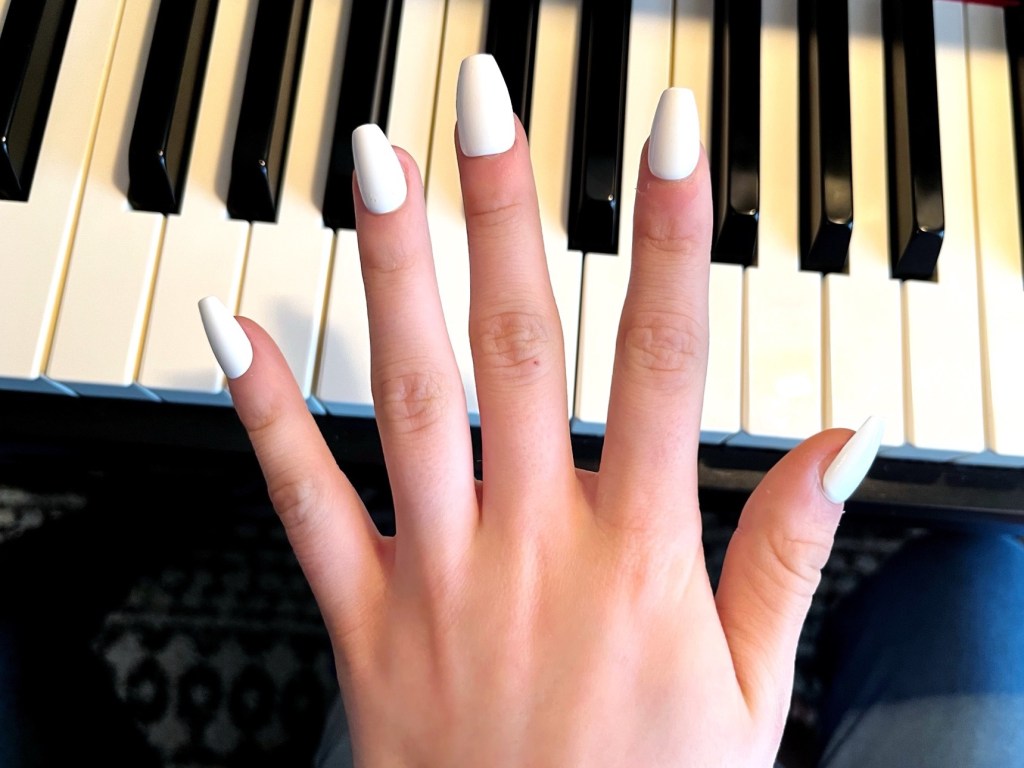
It’s a pet peeve… and it’s not unfounded! Long fingernails are a real problem for learning to play the piano.

My hope is that this post will help guide conversations between teachers and parents about this important topic. Any conversation of this nature, in my opinion, should be approached with compassion and understanding.

On the one side, fingernails can represent more than mere vanity; they can serve as a form of cultural expression, personal identity, or even a reflection of one’s creative or professional journey.

For the piano teacher, on the other hand, long fingernails can be an impediment to their job of teaching a student to play the piano with proper technique. Teachers are professionals who know the challenges of the instrument and the path to achieve mastery; their opinions and advice on the subject have weight and value.

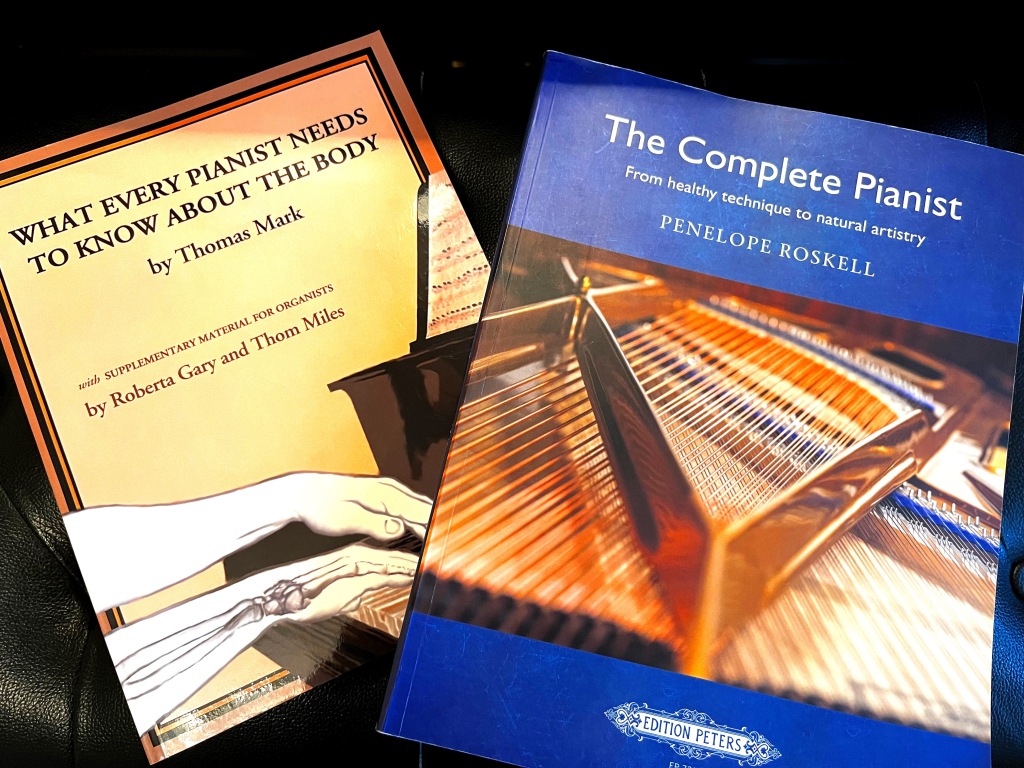
All the discussions in this post provide a high-level overview. For a deeper dive into body mechanics and proper technique I recommend the following books:

Two books about body mechanics and piano playing sit on top of a piano bench.
  1. Why are Long Fingernails so Bad?!
    1. Nail Clicking
    2. Hand Posture
    3. Movement
    4. Injury
  2. How Long should Fingernails Be?
  3. What if a Student wants to Keep their Long Nails?

Why are Long Fingernails so Bad?!

Long fingernails are not inherently bad. On the contrary, as I mentioned, they can be a powerful and beautiful form of self-expression and can even boost self-confidence. However, for piano students, this beauty and artistry come with a hidden cost.

The truth is that long fingernails inhibit the development of proper piano technique, which limits what a student is capable of playing and could eventually lead to injury.

But let’s break it down:

Nail Clicking

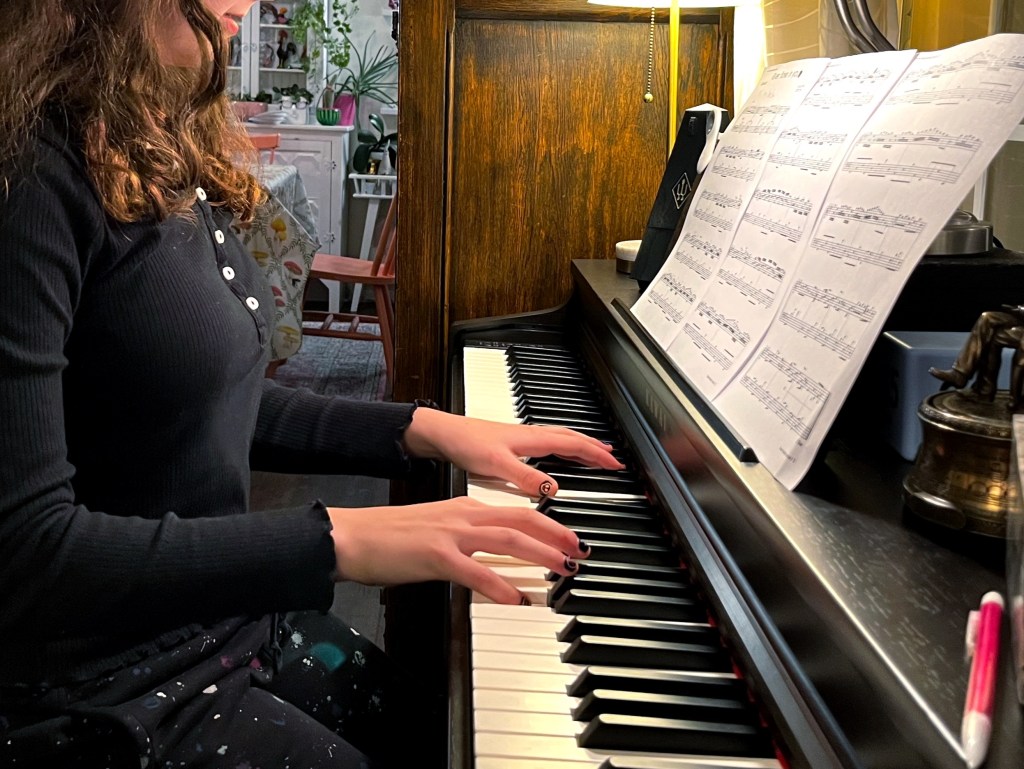
When fingernails are long enough they will make a tapping or clicking sound on the keys as the fingers strike the keys. And they don’t have to be very long for this to happen; in the video above I measured my nails to be about 1 mm long, which is very, very short by most people’s standards.

In a world where fingernail tapping is all over social media, it really has no place in creating music at the piano. A student should be developing their ear and listening intentionally and deeply to their playing. The constant clicking gets in the way of that and is just a big distraction.

Hand Posture

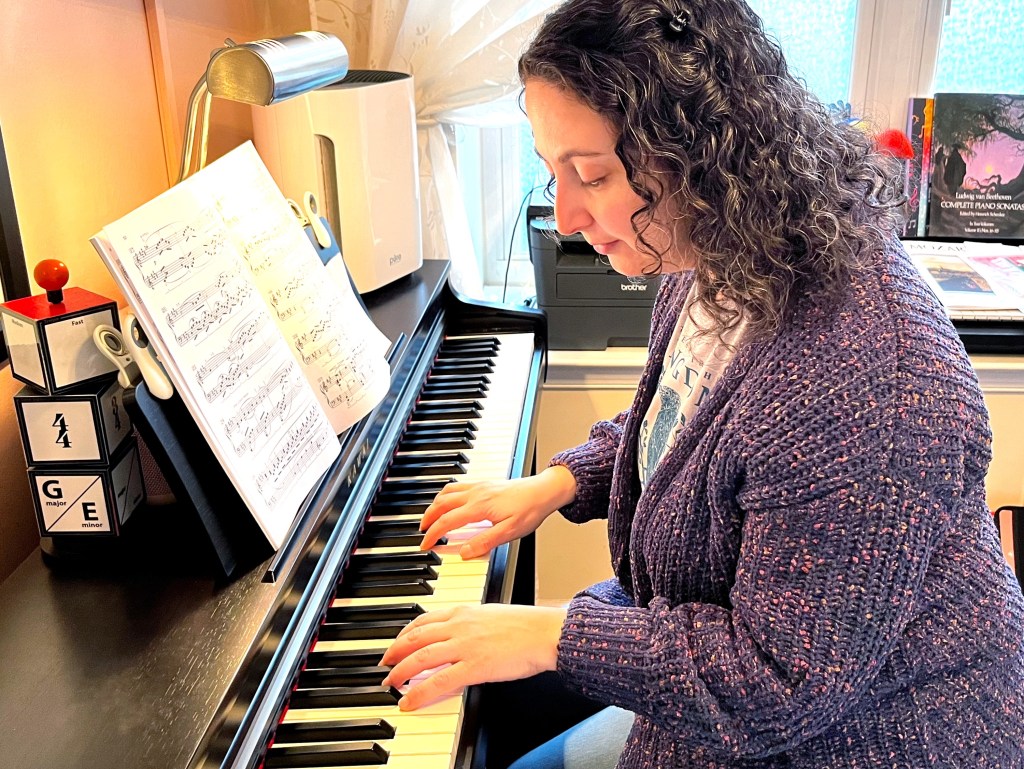
Proper hand posture at the piano resembles a hand at rest: fingers gently curled inwards towards the palm of the hand, thumb slightly bent. If one were to freeze their hand in this position and place it on the piano, the fingers would touch the keys on the padding close to the fingertips, but not the actual fingertips (if this happens, the fingers are too curled).

Student demonstrating proper hand posture plays the piano.

When fingernails are too long, the fingers sit on the keys in a more stretched-out position. The point of contact with the keys is now the full pad of the finger, encroaching on the 2nd joint of the finger (the distal inter-phalangeal joint, DIP joint, to be more precise), if the nails are long enough.

The knuckles also flatten out, which causes the natural bridge of the hand to collapse. As we will see next, this is going to have serious consequences on how the student will be able to navigate the piano.

Movement

Long fingernails will restrict the range of movement the hand can execute at the piano.

Outstretched fingers will cause the student to lift the fingers from the knuckle, putting unnecessary strain on the tendons of the hand. This up-down motion of the fingers will cause tension in the thumb, which could start to curve outwards.

Long fingernails also collapse the knuckles which ends up restricting the movement of the wrist. The importance of the wrist in piano playing cannot be overstated. The wrist allows for fluidity, control, and expressiveness. Compromising the wrist’s freedom is like putting casts on the legs of a runner and asking them to run a marathon… a student’s playing will be stiff, limited, and their movements will be inefficient.

With all these restrictions on its natural movements, the body will then try to adapt and find ways to play the notes the brain wants it to. This is when the hand starts twisting in odd ways and the elbow juts out away from the body (something I like to call “Chicken wing”).

The result of these awkward movements can be heard in the music in the form of unevenness, limited speed, unintentional accented notes, uneven articulations, and the list goes on and on…

Injury

And all of the above could ultimately lead to injury… Practicing the piano is a task based in part on repetition. And a lot of it! Students will often have to practice passages over and over again to eventually work out all the problems and difficulties.

When movements are unnatural to the body and cause the body strain, sooner or later pain starts to creep in. Oftentimes students will power through the pain, choosing to abide by the “no pain, no gain” mentality.

A hand in a wrist brace sits on the keys of a piano

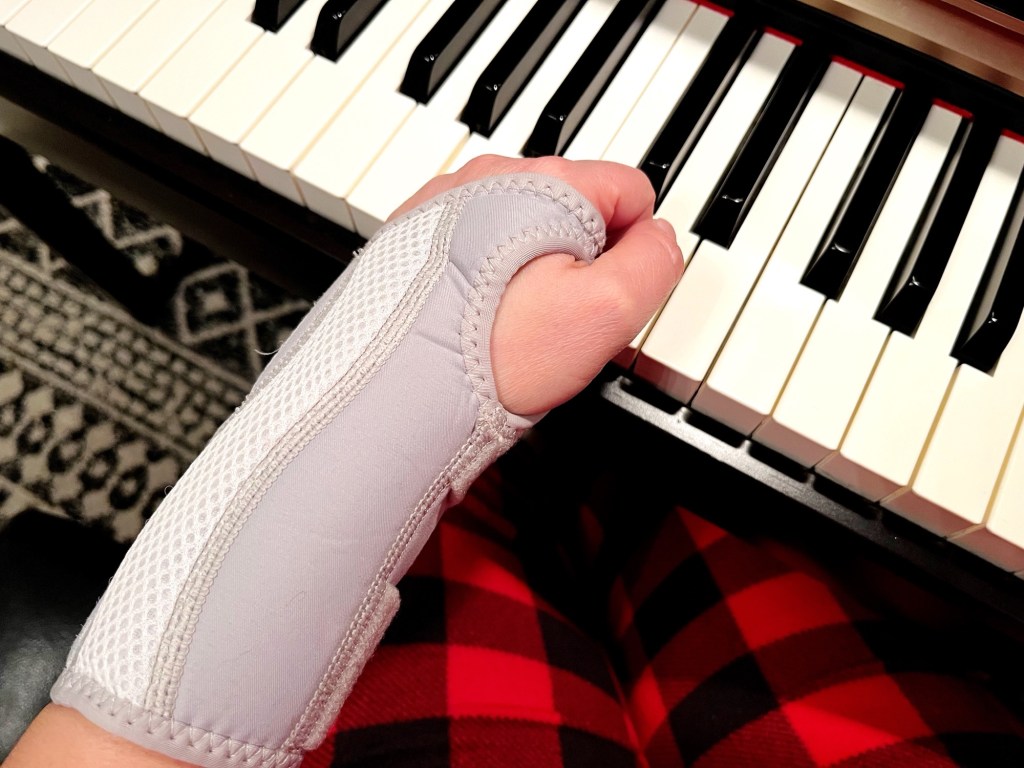
But pain is a sign that something is wrong and needs to be addressed. If left unchecked, a student could end up with: carpal tunnel syndrome, tendinitis, muscle strain, repetitive strain injury (RSI), neck and back pain, among others.

Another potential injury that can occur is when the fingernail gets caught between the keys of the piano. Because it happens so quickly, we usually do not realize that the nail is trapped until the finger tries to follow through with the motion it started. The trapped nail could end up breaking or pull at the at the hyponychium (the point where the nail meets the fingertip) and potentially causing a tear and bleeding. Although not as serious as other injuries, it is definitely annoying and can be quite painful in the moment.

How Long should Fingernails Be?

I have lived by the advice of one of my favorite piano teachers growing up: if the nail is peeking over the fingertip, it is time to cut it.

Arrow points to fingernails growing beyond the top of a finger.

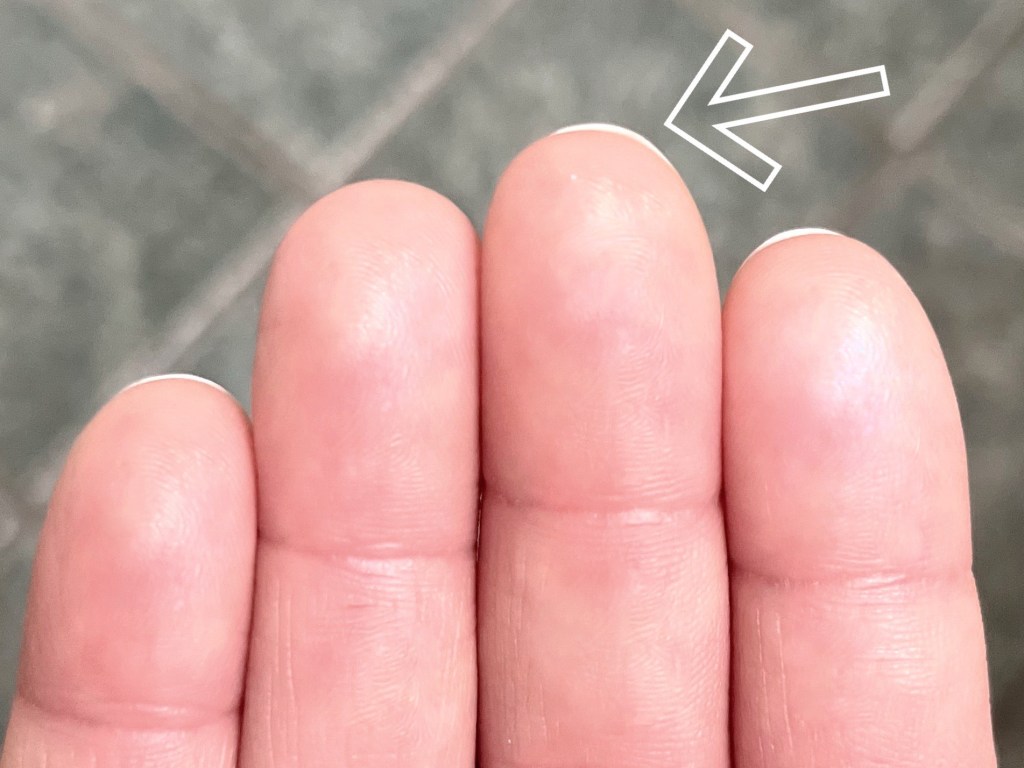
A student can also pay attention to their playing and ask themselves if anything feels off or if they are hearing a clicking sound.

What if a Student wants to Keep their Long Nails?

Like most things in life, choices are compromises. We gain one thing but also have to come to terms with the reality that we may be giving up other things.

The reality here is that choosing longer fingernails will limit what a student will be able to play.

The vast majority of piano students will be hobby pianists. Very few will make music their profession and even fewer will have concert careers.

A hand with white fake press on nails is outstretched over the keys of a piano

My advice is for teachers, students, and parents to talk about long fingernails and their drawbacks.

I always reiterate my thoughts on fingernails around recital time. I want my students to be able to perform with confidence and having long nails will affect their playing.

Ultimately, though, it is their choice. My job as a piano teacher is to educate. My hope is that, by providing them with all the information, they will be able to make a decision they are comfortable and happy with.

And this can take many forms… some students have chosen to get a manicure after a recital as a reward, others opted for shorter manicures (but still a bit long for my personal liking for the piano), while others go short, not wanting to tempt the fates at the recital.

For serious students, this tends to be a one-and-done conversation. They are committed to the piano and learning to play well is the priority.

For all the others, it will most likely come down to personal preferences and sometimes special events (like dance competitions, weddings, or graduations). And at the end of the day, everyone is entitled to their choices in life and we must respect that. And that respect should be extended both ways as a teacher may choose not to teach students with long nails.

As mentioned previously, for more information on proper piano technique and body mechanics, check out these books:

Explore more creative teaching ideas
  • Top Practice Tools Every Piano Student should Have: Curiosity
    Curiosity is the catalyst that gets students to start learning the piano in the first place and can be exactly what’s needed to keep them going for the long haul. Why is it so important and how do we keep it going? What if I don’t play an instrument, but want to encourage my child in their practicing? Check out all the answers plus download a free printable for parents!
  • Positive Notes: Recital Encouragement
    Spread some positivity and encouragement to your students this recital season with these adorable Positive Notes! They will help remind them of how hard they work and how much you believe in them.
  • Slurs & Ladders: The Recital Prep Game
    If there is one game my students beg to play year after year (and sometimes when we don’t even have a recital anytime soon!) is this recital prep game. It’s a great de-stressor and it shows students how prepared they are to perform while also injecting some fun and joy back into those recital pieces that may be sounding a little tired.

Let’s stay in touch, join the list!

As a “toucan” of our appreciation download a free set of note flashcards (link in our Welcome email)!

Processing…
Success! You're on the list.

We are a participant in the Amazon Services LLC Associates Program, an affiliate advertising program designed to provide a means for sites to earn advertising fees by advertising and linking to Amazon.com. As an Amazon Associate we earn from qualifying purchases.

Eyes on the Music! Fun and Effective Strategies to Stop Students from Looking at Their Hands

Do your students constantly look down at their hands when their playing?

Beginner students will often look down at their hands because they don’t trust their fingers to navigate the keys soley by touch. In order to avoid mistakes, they look down from their music to visually find the next note they need to play. Their eyes become a crutch which delays the development of the spatial awareness and muscle memory they need to play the piano.

Piano student looks down at her hands while playing the piano.

  1. Why is it important for students to keep their eyes on the music?
  2. Exercises for Keyboard Awareness
  3. Practice Strategies to Keep Eyes on the Music
  4. Can Students EVER look down when playing?
  5. Let’s stay in touch, join the list!

As teachers, we want our students to trust their fingers, develop a deeper connection with the piano, and, ultimately, become confident pianists. To do so, we can use exercises during our lessons to help students build confidence in finding their way around the piano by touch, as well as suggest practice strategies that encourage them to stay focused on the music by blocking their view of the keys (because let’s face it, habits are very hard to break and sometimes we need a little helping hand… or beard! Or even a hoodie!!).

As teachers, we want our students to trust their fingers, develop a deeper connection with the piano, and, ultimately, become confident pianists.

A piano student confidently plays the piano while keeping their eyes on the music.

Why is it important for students to keep their eyes on the music?

In the beginning stages of learning a piece, we are teaching our fingers the movements and distances they need to navigate in order to play that particular piece. By constantly looking and placing our hands and fingers on the right keys we are not allowing our fingers to feel their way around the keyboard and learn how far they need to go to play. Just like a basketball player has to be able to dribble a ball without staring down at it, a pianist must be able to navigate the piano without looking down all the time.

Just like a basketball player has to be able to dribble a ball without staring down at it, a pianist must be able to navigate the piano without looking down all the time.

Another reason we don’t want to look down is because it cuts the flow of the music. The small amount of time it takes to look down at the hands and then look up again to find our place in the music is enough to miss a beat or two… or even more. Looking down becomes a crutch for students and introduces pauses in the music, which can become ingrained and end up compromising the overall flow and structure of the piece.

Exercises for Keyboard Awareness

1) What Key is that?

This is a great exercise for students to really think about what key each individual finger is resting on. Have the student find the starting position of their piece. Close their book and have the student close their eyes. Then ask them, “What key is finger 2 of your right hand sitting on?” When the student has answered, ask about a different finger, “What key is finger 4 of your left hand sitting on?” And so forth, alternating hands and scrambling the finger numbers you call on.

I encourage students to visualize the piano in their mind’s eye and tap the finger I’m asking about on the key (without actually playing it).

Piano student keeps eyes closed while visualizing the keys of the piano in her head.

As students become more confident, you can move their hands to random positions on the piano or increase the speed of your questions.

2) Find your Spot

This is a great exercise for students to feel how their arms are also an integral part of placing their hands on the piano (students often become hyperfixated on the fingers and hands and don’t realize how important everything from the wrist up is!). It also helps them to really feel the key patterns on the piano with their fingers.

Cover the piano keys. Open their book to the piece they are working on. Ask the student to place their hands on their head. Have them analyze the starting position of their piece. When they feel they are ready and have a mental image of where their hands should be placed on the piano, have them close their eyes.

Piano student closes her eyes and places her hands on her head while sitting at the piano.

Uncover the piano keys and tell them to find their starting position by just feeling their way around the piano. With their eyes still closed, the student will lower their hands and attempt to place their hands on the correct keys. When they think they have it, they can open their eyes and see if they are right.

3) One Small Leap…

A lot of beginner music has students playing in one position throughout the entire piece. This exercise helps students make small moves around the playing position to build awareness of the keys that are close by.

Have the student place their hands in the starting position of their piece, then ask them to close their eyes.

Give instructions such as:

  • Move your left hand thumb up a step. What key is it on now?
  • Move your right hand pinky up a step. What key is it on now?
  • Move your entire right hand down a step. Play and name all the keys your fingers are touching.
  • Move your entire left hand up a skip. Play and name all the keys your fingers are touching.
  • Cross the second finger of your right hand over your thumb. Play the key and name it. Then return your hand to the starting position.
  • Move finger 3 of your right hand onto the black key a half step below it. Play the key and name it.
  • Any other movement that is in their practice piece or variation you can think of.
A right hand on the piano crosses finger 2 over the thumb to play a B

Practice Strategies to Keep Eyes on the Music

Habits can be hard to break in general and if a student has become reliant on looking at their hands while playing, they may need some extra help to not peek… especially because sometimes they don’t even realize they are doing it!

So, how can we encourage students to keep their eyes on their music?

1) Cover the Student’s Hands with a Book

If a student is constantly looking down at their hands during a lesson, a quick fix is to hold a book over their hands, obstructing their view. Students are usually amazed with themselves that they can in fact play the piece withouth looking down!

Piano teacher holds a book over a piano students hands to obstruct their view of the keyboard.

This practice strategy can be used at home as well if a parent is available to help.

2) Use a “Beard”

The second strategy is both fun and effective. I saw a similar trick years ago online and when I saw this Santa beard at the store over the holidays I knew I had to have it for my studio. I extended the beard with some fleece.

A package containing a Santa beard and glasses disguise sits on a piano bench

The student puts on the glasses. Then the student tucks the end of the beard under their book on the book rack. The beard hides the student’s hands from view.

Piano student wears a beard connected to toy disguise glasses to obstruct her view of her hands while playing the piano.

It’s hilarious and it works! If you’d like to have a one of your own, you can use a pair of toy glasses and connect a piece of cloth to them.

3) Use a Hoodie worn Backwards

But what about home practice? You can’t always lend out your beard and a parent may not be available to sit with a student while they practice. In this case, the student can use something that is ubiquitous with kids nowadays… the hoodie!

A student plays the piano wearing a hoodie that is on backwards. The hood is lifted so the student cannot see their hands.

This trick works like a charm! Have the student turn their hoodie around, so that the hood is in front of them. The student then adjusts the hood so it is propped up. And there you go! They will not be able to see their hands when they play.

Can Students EVER look down when playing?

Yes! There is a time and place for everything. The real question becomes, “Is what I’m doing benefitting the music? Am I achieving the sound I want from the piano when I look down?”

In general, large leaps and difficult passages require more from us and we do look down at our hands to navigate these passages. BUT at this point, the music is usually memorized and/or looking down has become part of the how the pianist plays the piece. Looking down in this case is not a crutch but adds to the accuracy and flow of the music.

Pianist plays a piece by Beethoven while looking down at the keyboard.

Explore more creative teaching ideas
  • Slurs & Ladders: The Recital Prep Game
    If there is one game my students beg to play year after year (and sometimes when we don’t even have a recital anytime soon!) is this recital prep game. It’s a great de-stressor and it shows students how prepared they are to perform while also injecting some fun and joy back into those recital pieces that may be sounding a little tired.
  • Top Practice Tools Every Piano Student should Have: #4 Recording Device
    When used strategically, a recording device can help students gain valuable insight into their playing and progress faster! I’m sharing my favorite recording equipment and different ways students can use recording themselves as a practice tool to improve their playing.
  • Top Practice Tools Every Piano Student should Have: Curiosity
    Curiosity is the catalyst that gets students to start learning the piano in the first place and can be exactly what’s needed to keep them going for the long haul. Why is it so important and how do we keep it going? What if I don’t play an instrument, but want to encourage my child in their practicing? Check out all the answers plus download a free printable for parents!

Let’s stay in touch, join the list!

As a “toucan” of our appreciation download a free set of note flashcards (link in our Welcome email)!

Processing…
Success! You're on the list.

We are a participant in the Amazon Services LLC Associates Program, an affiliate advertising program designed to provide a means for sites to earn advertising fees by advertising and linking to Amazon.com. As an Amazon Associate we earn from qualifying purchases.