

Every year I make an ornament for my students as a gift during the Holiday season. I try to make it music-related or a tie-in with a practice challenge we are working on in December. I gift it to them during our last lesson before our winter break. I love to hear how they use the ornaments on their trees every year and how they enjoy watching their collection grow! It always warms my heart!
This year I was inspired by an ornament I found on Pinterest (unfortunately it doesn’t appear to be available for purchase anymore on Etsy). I wanted to put my own twist on it and add a little more color and musical elements. I made a total of 40 ornaments and the final cost was roughly $1/ornament, including the use of coupons and store promotions (plus the time to make them. It did take me several hours, so that’s definitely a consideration to factor in!).
For this craft you will need:
– Vintage sheet music (I found some free vintage sheet music online and printed it out)
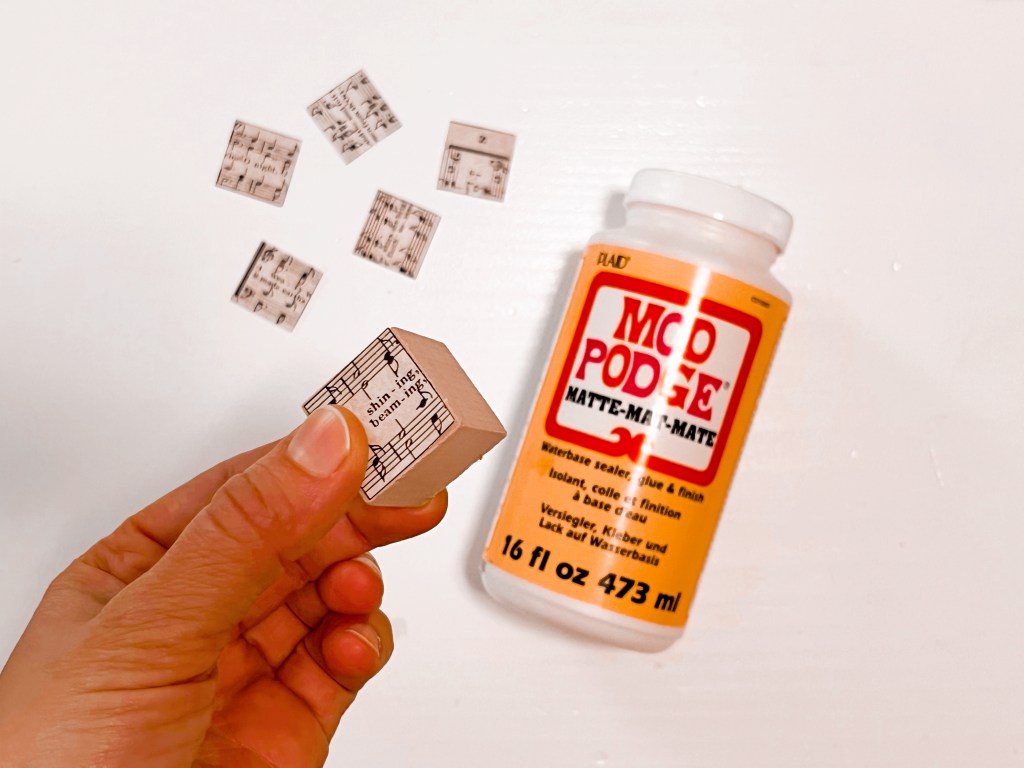
– 1 inch unfinished wood craft cubes
– Mod Podge or white glue
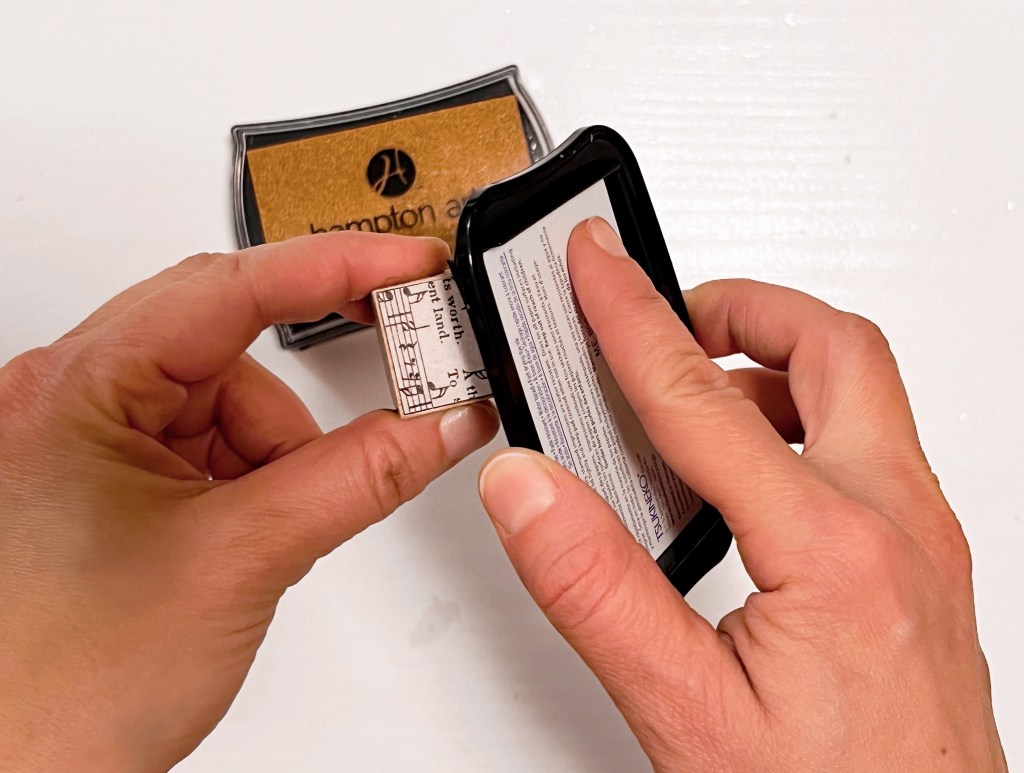
– Stamp pad(s) of your choice (I used rich cocoa and gold)
– Thin ribbon
– Treble clef charms
– Mini jingle bells (10 mm in diameter)
– Mini red pom-poms (5 mm in diameter)
– Seasonal greenery (I chose glittery green leaves)
– Hot glue gun and glue

Cut the vintage sheet music into 0.95″ (2.40 cm) squares. You will need 6 squares per wood cube.

Use the Mod Podge (or white glue) to adhere the sheet music squares onto the sides of the wood cube.
Once the glue has dried, use the stamp pad(s) to age the paper. I started with the rich cocoa stamp pad, lightly working from the edges inwards. I did all six sides, then went over the cube a second time, this time with the gold stamp pad to give it more depth (and this is the point that my fingers became a rich cocoa in the pictures! lol).
I decided to seal the ink with a layer of Mod Podge for added protection. This step is optional, but it does give the cube a nice shine, so I was happy to put in the extra time.
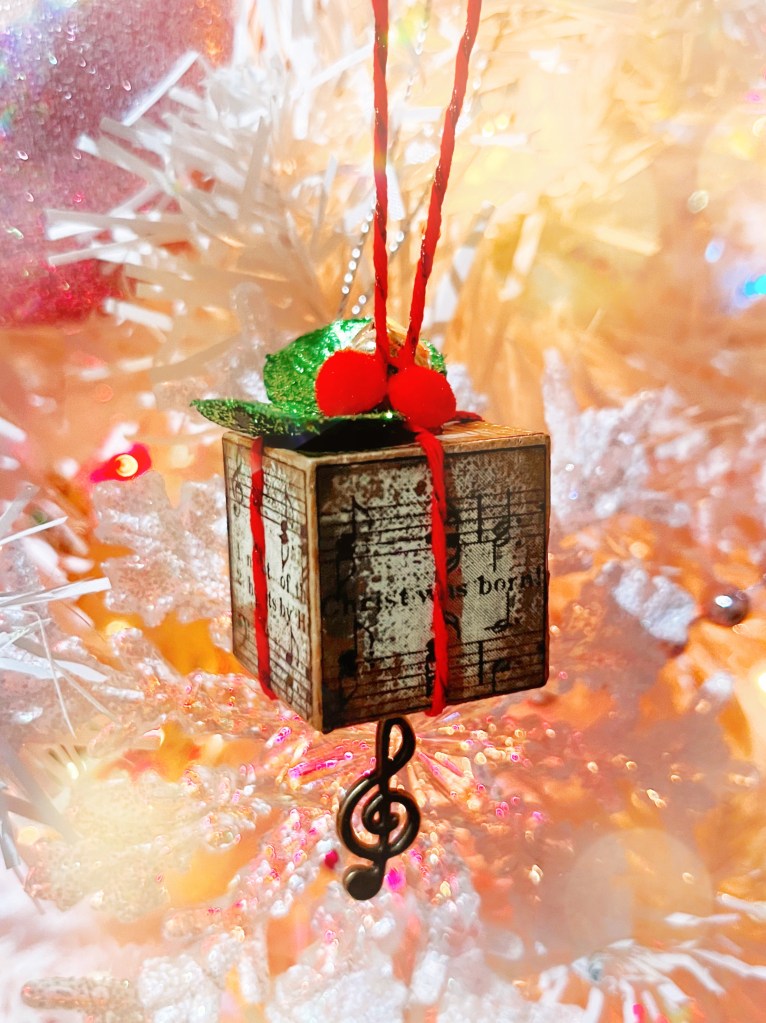
String the treble clef charm through the ribbon and wrap the ribbon around the cube like you would wrap a ribbon around a present. Make sure that the charm stays on the side that you want to be the bottom. I added a dot of hot glue to secure the charm to the bottom of the cube. Tie a knot at the top of the cube, making sure that the ribbon is taut against all the sides of the cube.

Then tie a knot with the ends of the ribbon to create a large loop with which to hang the ornament to the tree.

Add embellishments, such as greenery, pom-poms, and a mini jingle bell, to the top of the cube using hot glue. Try to distribute the embellishments in a way to hide the knot on the top of the cube.

The music ornament is all done! I made mine in three different colors: green, red, and blue. I was so happy with the way they turned out. I can’t wait to give them to my students!


Let’s stay in touch, join the list!
As a “toucan” of our appreciation download a free set of note flashcards (link in our Welcome email)!
We are a participant in the Amazon Services LLC Associates Program, an affiliate advertising program designed to provide a means for sites to earn advertising fees by advertising and linking to Amazon.com. As an Amazon Associate we earn from qualifying purchases.
