Rainbow Manuscript Paper

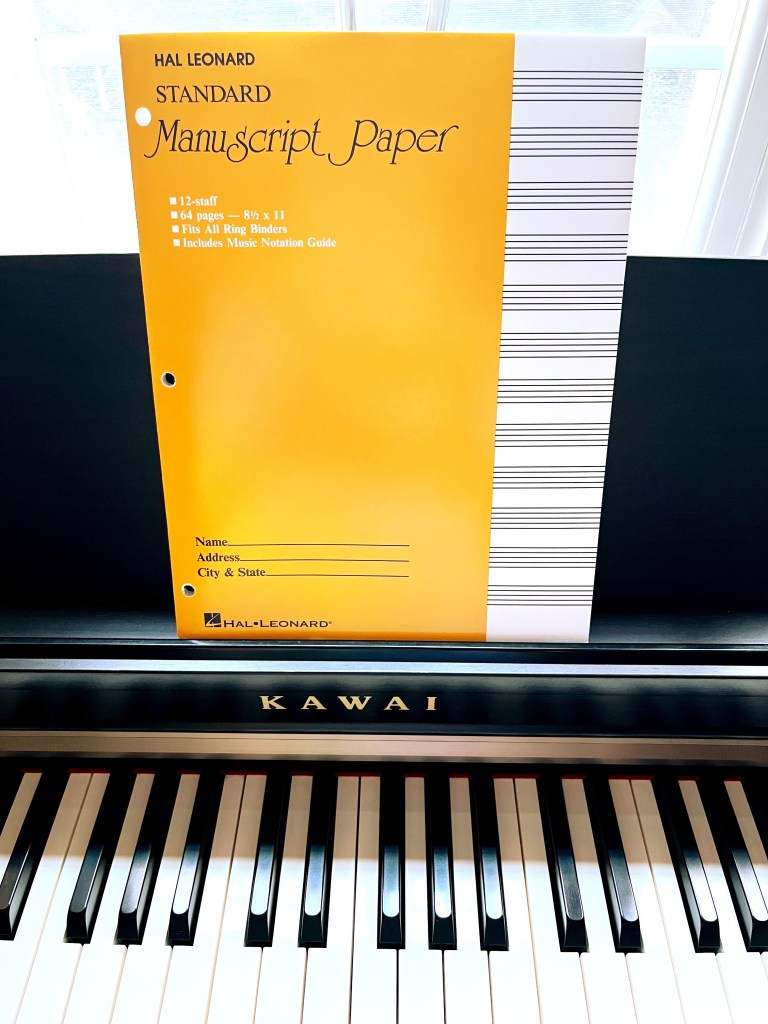
This month my students are working on their own compositions. I love seeing their creativity come to life through their music! But nothing stops creativity in its tracks more quickly than a blank piece of paper. In our case, a blank piece of manuscript paper.

Piano teacher smiling while handing a student a sheet rainbow colored manuscript paper

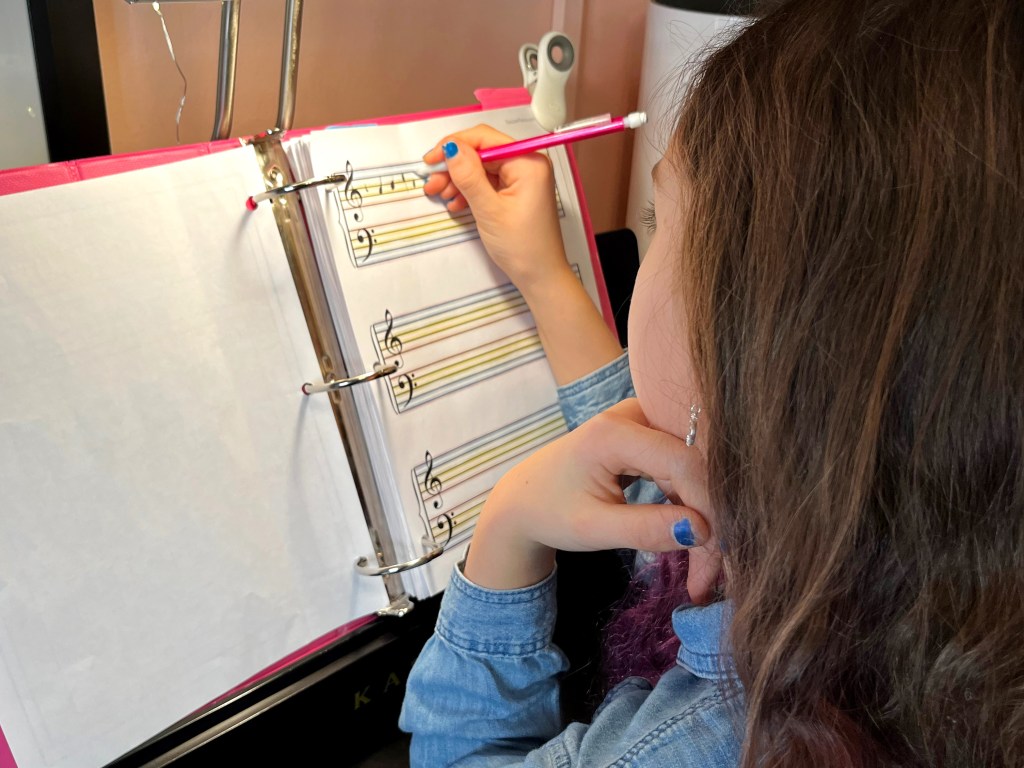
Since we are in the season of hearts and rainbows – Valentine’s Day and St. Patrick’s! – I couldn’t help but make rainbow grand staff music sheets for them to work with.

It’s just enough color to take away some of the starkness of the blank staff but not enough to distract from the actual music making. My younger students have loved them!

Young piano student with her hand on her chin is writing music notes on a sheet of rainbow colored manuscript paper with a pink mechanical pencil

The rainbow manuscript paper is available in the Toucan Piano shop as a free printable! Print as many as you like for your students.

They are available in three sizes, so they can be used for a variety of ages and activities, like:

  • Writing out original compositions
  • Explaining music theory concepts
  • Music dictation
  • Games
  • Writing out exercises for students to do at home
  • Write the final copy of a composition to gift to a parent on Valentine’s day
  • And so much more!
Child with blue nail polish is writing music notes on a sheet of rainbow colored manuscript paper

I hope that the rainbow manuscript paper helps bring smiles to your students’ faces and gets the music flowing!

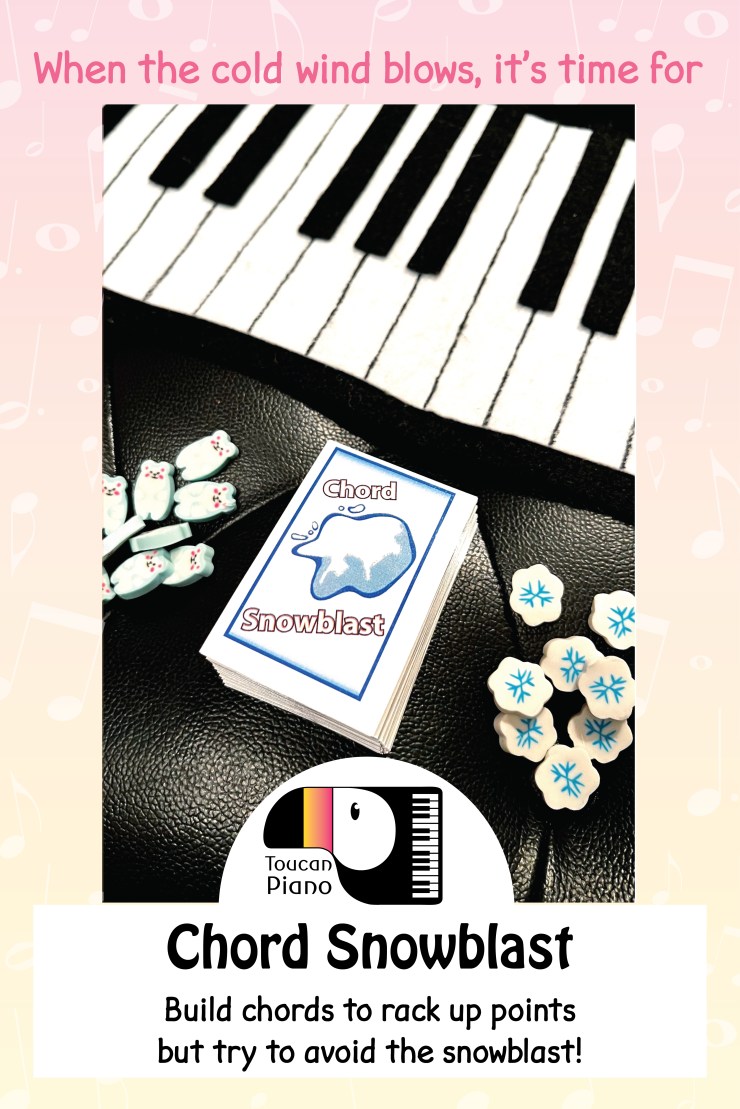
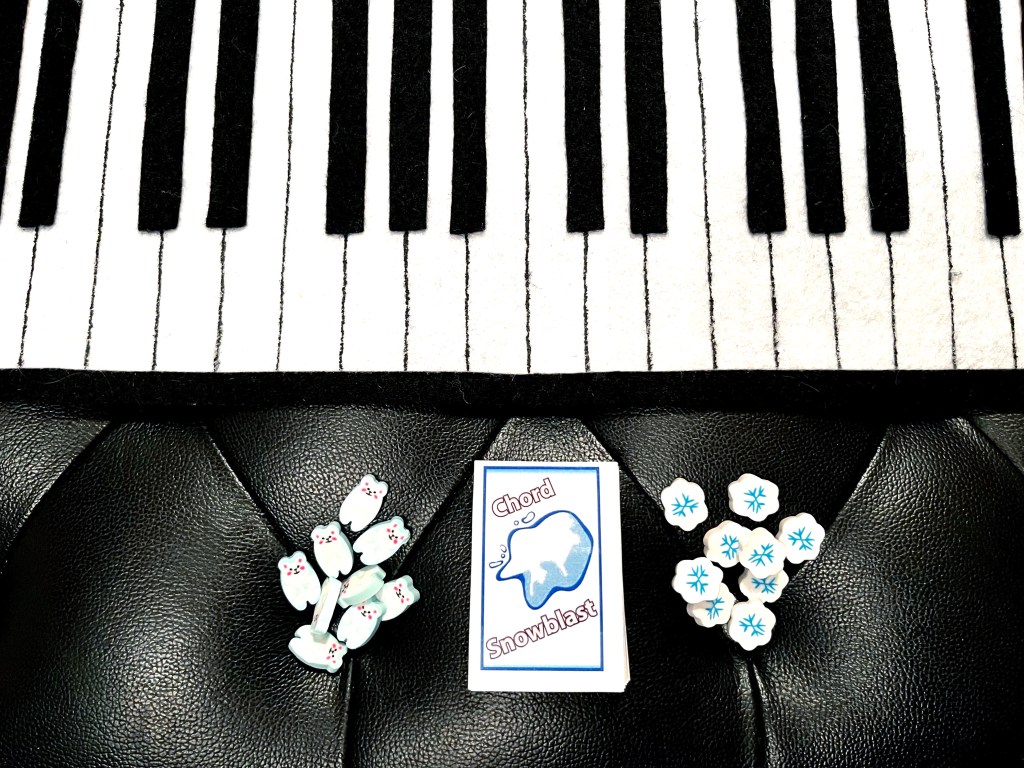
For more teaching resources and piano teaching games, check out the Toucan Piano shop.

Let’s stay in touch, join the list!

As a “toucan” of our appreciation download a free set of note flashcards (link in our Welcome email)!

Processing…
Success! You're on the list.

We are a participant in the Amazon Services LLC Associates Program, an affiliate advertising program designed to provide a means for sites to earn advertising fees by advertising and linking to Amazon.com. As an Amazon Associate we earn from qualifying purchases.

Music-Themed Candle Craft

Every year I make my students a music-themed gift around the holidays (usually an ornament! You can check out last year’s gift here). I have a lot of students so I always opt for a handmade gift because 1) I love crafting and showing my love for others through crafting and 2) it’s extremely cost effective.

I gift them to my students at our last lesson of the year and it always warms my heart when parents share pictures of my ornaments on their trees year after year. This year I decided to transform battery-operated candles into little piano themed lights for their pianos at home. I made a total of 36 candles and the final cost was roughly $1.50/candle (not including the time to make them, which was several hours spread out over 3 days. Time is always something to keep in mind when crafting in quantity!).

If you’d like to watch me craft a candle, check out my YouTube short:

For this craft you will need:

Picture of tools and supplies needed to complete the craft. Tools required are hot glue gun and glue, Mod Podge waterbased sealer and glue, paintbrush, scissors, bowl, and nail file. Supplies needed are battery-operated candles, music note napkins, glitter, twine and your choice of embellishments (such as ribbon, keyboard charm, jingle bells, and sequin holly leaves).

Start by opening up the napkin and loosely measuring how many candles you can cover with a single napkin. My candles were 2 inches high and 1.5 inches in diameter, which allowed me to cut the napkin into eight equal rectangles. Cut the napkin according to the measurements of your candles.

Music note napkin unfolded with a pair of scissors hovering over it, indicating that the napkin should be cut into rectangles to fit the battery-operated candles.
Music napkin cut into eight equal rectangles.

The napkins I used have 3 plies (layers of napkin) which would make them a little thick and prone to wrinkling. I removed one of the plies (you could remove two plies and keep only the layer that has the sheet music printed on it. I tried this and found the napkin to be extremely delicate when gluing to the candle. One ply is possible to work with, just be extra gentle).

Napkin has three plies. Photo shows the back ply being removed to make the napkin thinner.

Now that the napkin is all prepped, cover the battery-operated candle with a layer of Mod Podge (or white glue).

Battery operated candle is being covered with a layer of Mod Podge (sealant glue) using a paintbrush.

Carefully attach the napkin to the candle, patting it gently to adhere it to the candle. If the napkin has any indentations in it, you can carefully smoothen them out by running your finger across them.

Music themed napkin rectangles is placed on the battery operated candle covered in glue.

Once the candle is dry, use a nail file to scrape the excess napkin off. Remember to always move the nail file towards the center of the candle (not away from it!) to keep the napkin from tearing. The napkin will fall off and leave a nice clean finish to the bottom and top of the candle.

A nail file is being scraped against the edge of the battery operated candle to remove the excess napkin from the candle.
Photo show the napkin easily falling off by using the nail file. This method leaves a clean edge along the candle.

Add a layer of Mod Podge over the napkin to protect it. Once it is dry, it will give the candle a slightly waxy look, like a real candle.

A layer of Mod Podge (sealant glue) is place on the candle with the napkin to protect the napkin.

Apply a thick layer of Mod Podge along the outer and inners rims of the candle to make it look like melted wax.

A paintbrush is used to apply a thick layer of Mod Podge (sealant glue) along the outer rim of the candle to imitate melted wax.
A paintbrush is used to apply a thick layer of Mod Podge (sealant glue) along the inner rim of the candle to imitate melted wax.

Pour the glitter into a small bowl and dip the candle with the thick layer of Mod Podge into the bowl to cover the Mod Podge. The “melted wax” will now have a sparkly shine to it.

The candle is dipped into a bowl filled with white glitter. The glitter sticks to the Mod Podge (sealant glue) along the inner and outer rims, making the melted wax sparkle.

Time for the embellishments! Apply a little hot glue to one end the ribbon and attach it to the candle. Measure how long the ribbon should be to wrap completely around the candle and trim it to size. Glue down the rest of the ribbon.

Apply hot glue to the ribbon embellishment.
Wrap the ribbon embellishment around the battery operated candle. Cut the ribbon to size and glue in place.

Cut enough of the twine string to wrap it three times around the candle (leave a little extra on both ends to tie it into a bow!).

Wrap twine around the red ribbon embellishment 3 times.

Thread the keyboard charm onto the twine string and tie a bow.

Thread the keyboard charm through the twine and tie the twin in a bow.

Depending on the size of the charm (mine was rather large), add a little bit of hot glue to help hold it in place.

Apply hot glue to the back of the keyboard charm to help hold it in place.

Hot glue the holly leaves to the candle. I placed mine right above the twine bow.

Holly leaf sequins are hot glued to the candle as additional embellishments.

Final touch! Hot glue the jingle bell to the candle.

A golden jingle bell is hot glued to the candle and holly leaves as a final embellishment.

And there it is! Have fun experimenting with different embellishments (I used a red and white twine on some candles and replaced the holly leaves for gold glittery leaves on others)… if you teach siblings, it’s always nice to have something a little different so they each have their own special gift. You can even use a larger candle to make a beautiful holiday decoration for your piano (because we teachers deserve pretty things too!).

Finished music note candle craft sitting on a piano keyboard. The candle has red ribbon and twine tied around it as well as a keyboard charm, holly leaves and a jingle bell as embellishments.

They look so pretty together all lit up and ready to head off to my students’ homes!

Several music note candles sitting on a piano keyboard. The candles are lit up. The candles have red ribbon and twine tied around them and have a keyboard charm, holly leaves and a jingle bell as embellishments.

Let’s stay in touch, join the list!

As a “toucan” of our appreciation download a free set of note flashcards (link in our Welcome email)!

Processing…
Success! You're on the list.

We are a participant in the Amazon Services LLC Associates Program, an affiliate advertising program designed to provide a means for sites to earn advertising fees by advertising and linking to Amazon.com. As an Amazon Associate we earn from qualifying purchases.

25 Piano Gifts for Young Musicians

Looking for a last minute holiday gift to inspire your child to pick up their instrument and practice more in the new year?

Every year I send out piano-related gift suggestions to my piano families. It’s a nice way for parents to encourage and recognize all the hard work their kids put into practicing (because, unfortunately, the piano doesn’t always get the same sort of fanfare as sports and other extra-curricular activities). The list is always a mixture of useful and fun stuff and the kids always enjoy showing me the piano gifts they received when they come back from our Holiday break.

Everything on this list I’ve either purchased for myself, have had students purchase, or is currently on my wish list (in case anyone’s looking for a last minute gift for me! lol).

Here are my top picks for this 2022 Holiday Season!

Practice/Lesson Helpers

Metronome – The friend and nemesis of all musicians! It is always a useful tool to have at the piano. This metronome is a great size and has volume control (my mom for one could not stand the ticking sound of the metronome!). I loved it so much that I bought several to use with the children’s band at my church.
Metronomes are essential for practice and came in at no. 3 on my list of the Top 7 Practice Tools Every Piano Student Should Have.

Music Book Clip – There’s nothing worse than being in the middle of playing a piece and watching the book slowly shutting! This book holder will help keep those books laying flat on the book rack.
This is another essential practice tool and came in at no. 6 on my list of Top 7 Practice Tools Every Piano Student Should Have.

Manuscript Paper for Younger Kids – A perfect sized notebook for writing down compositions. It has a nice wide staff (easier for kids to write music on), 100 pages, and is 8.5 x 11 inches.
Manuscript paper is incredibly versatile and important for any piano student which is why it took the No. 2 spot on my list of Top 7 Practice Tools Every Piano Student Should Have.

Manuscript Paper for Older Kids and Teens – A perfect sized notebook for writing down compositions. It has holes to easily fit inside a three-ring binder, 64 pages, and is 8.5 x 11 inches.

Sheet Music Folder – I love the idea of students curating a folder of their favorite pieces. Pieces that they have mastered and loved and can easily revisit anytime they feel the urge to just play! This folder is a perfect place to put these pieces. The plastic sheet protectors keep those precious favorites safe as they are played over and over again!

Books

All About the Grand Staff with Guido D’Arezzo and Yookan the Toucan – Shameless plug of my book! It is a great choice for students who are just starting to learn to read music on the grand staff. My daughter has been playing for years and she picks up this book at least once a month to read for fun! She’s my biggest and best cheerleader! For more on my book, visit my blogpost about it.

Family Dynamics – An adorable adventure into the orchestra. Children get to meet the different instrument families along with Violin as she discovers her unique sound. Created by a music educator, the illustrations are whimsical and full of life.

Who was Wolfgang Amadeus Mozart? – The Who Was series is a great introduction for kids to learn about famous people, places, and events throughout history. In this book from the series, kids get to meet the great Classical Period composer Wolfgang Amadeus Mozart! I’m still waiting on a “Who was Ludwig van Beethoven?”…

Robert Schumann’s Advice to Young Musicians – Robert Schumann besides being an innovative and extremely creative composer, was a prolific writer. His original “Advice to Young Musicians” was published in 1848 and so much of it still holds true today! World-renowned cellist and author, Steven Isserlis takes Robert Schumann’s words of wisdom and brings them into our times, providing some additional thoughts from his own career. The chapters are short and filled with encouragement, advice and wisdom. For older readers and teens.

Why Beethoven threw the Stew – Steven Isserlis introduces older kids and teens to the people behind the great music! Ever witty and always informative, Isserlis brings six of his favorite composers to life: Bach, Mozart, Beethoven, Schumann, Brahms and Stravinsky. And if your kid enjoys this book, don’t miss the sequel Why Handel Waggled his Wig!

T-Shirts

A little humor, a lot of keys, and mega dose of style!

Music Literacy Matters – I often have to go over how 1st and 2nd endings for repeated sections work with my students. This t-shirt is a hilarious way to remember how they work! It’s the music version of “Eats shoots and leaves”. LOL

Piano Girl – This one I bought for my daughter years ago and she still wears it! It’s a favorite around here. Over time (and numerous washes!) it has taken on a vintage look which has made it look even cooler.

Music Theory – I have a music theory cheat sheet poster on my studio wall from Tone Deaf Comics. The kids are fascinated by it and we often refer to it when we are talking about theory concepts (especially the circle of 5ths). This t-shirt allows them to wear their music theory with pride!

Grand Piano Patent Print – The technical drawing of a 1928 grand piano patent looks incredibly cool on this t-shirt. Pianos are always cool, but there is something to be said about the beauty of a technical drawing showing the intricate details of the construction of a grand piano.

Think outside the Bachs – Ok, I laughed a little too hard at this one. And I’ve decided to get it for myself; it’s perfectly nerdy! It’s for the all die-hard classical pianists out there.

Accessories

Music Themed Jibbitz –  Let them bling out their Crocs with these adorable jibbitz.

Piano Purse  – Seriously, how cute is this?!! I’ll probably end up getting this for myself. (Update: I did!! I actually got the black and white one AND the pink one! They are adorable!)

Piano Necktie – This is perfect for a recital! I’m hoping one of my students shows up at our 2023 recital wearing this.

Piano Winter Scarf – This reminds me of a scarf that my grandmother knitted for me when I was a teenager. It’s a very stylish way to stay warm this winter!

Piano Shoelaces –  Imagine these on a cute pair of Converse sneakers. Adorable!

Fun Stuff

My Piano Pal Pillow – This adorable little pillow will smile at you no matter how your practice session is going! Handmade by a music educator and oh-so-cute, this pillow is perfect for any young pianist’s bedroom! It also comes in a version without a face.

Music Blanket – And if you have a piano pillow, you definitely need a blanket to curl up into while practicing on these cold winter nights or just to snuggle with.

Piano Tumbler – Because you need to stay hydrated while practicing (just remember to put it on the floor, not on top of the piano!).

Rainbow Music Tumbler – For those of us who dream of rainbow colored music (or have synesthesia, like Scriabin and Liszt claimed they had. They said they could see specific colors when they heard different notes.)

Pastabilities Music Pasta –  I thought this was hilarious! It’s a bit pricey for pasta, but you can make a whole themed-dinner out of it (and maybe even get your child to give a little mini-recital for the family! That’s what one of my piano families did!).

Let’s stay in touch, join the list!

As a “toucan” of our appreciation download a free set of note flashcards (link in our Welcome email)!

Processing…
Success! You're on the list.

We are a participant in the Amazon Services LLC Associates Program, an affiliate advertising program designed to provide a means for sites to earn advertising fees by advertising and linking to Amazon.com. As an Amazon Associate we earn from qualifying purchases.

Chord Snowblast

March is known for coming in like a lion and going out like a lamb (meaning that the beginning of the month tends to exhibit all the characteristics of winter – with its frigid temperatures, ice, and snow – but by the end of the month winter is gone and you can feel spring in the air). Well, not this year! This week winter came back with a vengeance.

When the weather throws you curve balls, there is really only one thing to do… match your piano chord games to the weather! And Chord Snowblast was the perfect choice! Chord Snowblast is a piano game that covers all the major and minor chords but the teacher can select the chords most appropriate for the student’s level.

piano keyboard snow snowball card stack about music chords with snowflake and polar bear erasers game markers

We even pulled out the polar bear and snowflake erasers to make our chords. Given the weather in the Instagram post below, they would have been right at home!

Players take turns drawing cards from the pile. Each card has a chord that the player must build on the piano (or in our case, a felt keyboard) using the mini-erasers. I also had my students play the chord on the piano after they were done building it.

piano keyboard snow snowball card stack about music chords with snowflake and polar bear erasers game markers minor chord

Here is a student in action:

Each chord is worth a certain number of points. Once the chord is built successfully, the player writes down the number of points he/she earned that round. The “harder” the chord (meaning the more sharps/flats in a chord), the more points to be earned!

This student wanted to play through the whole deck and she squashed me!! I felt I should have given her bonus points as well because she was calling out enharmonic chords (for example, B-sharp major and C major) whenever she saw them! I was SO impressed!

polar bear erasers on piano keyboard forming a minor chord with scoreboard with points breakdown and point totals

Watch out for the wildcards mixed into the deck! Especially the Avalanche card… how many chords can you build in 1 minute?! Here was my 30-second attempt (I love how my student is cheering me on!):

This game available in the Toucan Piano Shop: Chord Snowblast. It comes with 42 chord cards and 12 wildcards. It’s great for individual or group lessons to reinforce major and minor chords.

I would love to hear what you think if you decide to play this game with your students. We had a blast and almost – almost! – forgot about how cold it was outside.

black labrador retriever lab mix dog wants to play chord card game at the piano keyboard with speech bubble saying can i play

Let’s stay in touch, join the list!

As a “toucan” of our appreciation download a free set of note flashcards (link in our Welcome email)!

Processing…
Success! You're on the list.

We are a participant in the Amazon Services LLC Associates Program, an affiliate advertising program designed to provide a means for sites to earn advertising fees by advertising and linking to Amazon.com. As an Amazon Associate we earn from qualifying purchases.

Pot of Gold: Rhythm Game

Happy St. Patrick’s Day!!! If you are looking for a last minute game to play with your beginner/elementary students with things you probably already have on hand, this simple rhythm game fits the bill! This game is great all year round, all you have to do is change the game markers.

For the St. Patrick’s day version of this game I am using 40 gold coins, mini pots/cauldrons (also great for Halloween games!), and rhythm note/rest dice. I made the dice by gluing note and rest stickers on the sides of a blank die. Check out my blog post on how to make your own music theory dice!

pot of gold coins with rhythm dice

The student rolls his/her rhythm die and names the note or rest it lands on.

pot of gold coins with hand rolling rhythm die dice

The student should then determine the number of beats the note/rest gets and put the corresponding number of gold coins in his/her pot.

Half note rhythm die dice with two gold coins

For example, if the student rolled a half note, he/she should then place 2 gold coins in their pot.

hand placing gold coins in a pot cauldron

It is now the teacher’s turn. The teacher follows the same procedure above.

The first player to collect 20 gold coins in their pot wins!

For students who enjoy some adrenaline and intense competition, instead of taking turns, both players roll and fill their pots at the same time. When played this way, the game is turned into a race to see who will fill their pot first!

This is a fast-paced game which is great to play when you have less than 5 minutes to fill at the end of a lesson. And there is just something so satisfying about dropping the gold coins in the pots!

For more St. Patrick’s Day fun, check out Two Sides of the Same Coin in the Toucan Piano Shop. For three different ways to play it, check out the blog post Two Sides of the Same Coin.

Let’s stay in touch, join the list!

As a “toucan” of our appreciation download a free set of note flashcards (link in our Welcome email)!

Processing…
Success! You're on the list.

We are a participant in the Amazon Services LLC Associates Program, an affiliate advertising program designed to provide a means for sites to earn advertising fees by advertising and linking to Amazon.com. As an Amazon Associate we earn from qualifying purchases.

Two Sides of the Same Coin

St. Patrick’s Day is just around the corner and although I’m not Irish (but I do wear green on St. Paddy’s), I love the joy surrounding this holiday! Delicious food, great music, rainbows, and little mischief (courtesy of the Leprechaun)! What’s not to love?!

I always play games with my students during St. Patrick’s week and today I wanted to share a versatile game about enharmonics called Two Sides of the Same Coin (available in the Toucan Piano Shop)! It can be played at least three different ways with many different combinations of coins to put your students’ knowledge of sharps and flats to the test!

st patricks day piano game using gold note coins

As I mentioned, there are multiple ways to play this game based on your student’s level and what you would like to work on with them. The first is trying to create enharmonic pairs by drawing coins from a container (I used a cauldron/pot because it’s St. Patrick’s Day!). Detailed instructions are included in the game download. Here is a short reel of a student and I playing it:

Another way to play the game is as a Memory game. Place the coins face down with the golden shamrocks facing up. The student flips over two coins to see if they get a match. If they get a match, they keep the coins in their pile and go again. If they don’t get a match, it’s then the teacher’s turn. If the teacher gets a match, the teacher keeps the coins and goes again. If the teacher does not find a match, then it’s the student’s turn. Go back and forth taking turns looking for matching pairs until all the coins have been claimed. The player with the most coins at the end wins!

st patricks day memory piano game using gold coins

Matches can be any combination of coins you would like to drill:

  • Match the enharmonic names
  • Match the notes to their names (this version would be for students who are just learning to identify sharps and flats)
  • Match the enharmonic notes on the staff
st patricks day memory piano game gold coin notes and names matches

Another game to play is Mystery Note! The teacher chooses a key on the piano but does not tell the student which one it is. The teacher then sets a timer for 1 minute. The student has 1 minute to pull coins out of the container and play the corresponding keys on the piano to try to discover the mystery note. For example, the student pulls out an A-sharp, so the student must play the A-sharp on the piano in order to pull out another coin. If the student finds the mystery key, he/she must then name that key’s enharmonic in order to win! For example, the mystery key was C-sharp. The student pulls a C-sharp coin out of the container and plays the correct key on the piano. The teacher then says, “You’ve found the mystery note, what is the enharmonic of C-sharp?” The student must then say D-flat to win. For this version of the game, I would suggest using a smaller set of note coins depending on the student’s level and ease in naming notes on the staff.

Here is a reel of me challenging myself to find a note I chose at random! It was fun (and intense!… a minute goes by quickly)!! More competitive students will love the rush!

Two Sides of the Same Coin in available in the Toucan Piano Shop. I hope you have fun playing it with your students and may your day be touched by a bit of Irish luck!

Let’s stay in touch, join the list!

As a “toucan” of our appreciation download a free set of note flashcards (link in our Welcome email)!

Processing…
Success! You're on the list.

Composition Project: Compose a Ringtone

Creating a ringtone can be a fun and quick composition project for students! Since a ringtone is short (40 seconds) and, therefore, the composition needs to be short, it is a great little project even for students who are reluctant to compose or for very young kids. And as an added bonus, it can be made with someone specific in mind… for example, for mom as a gift for Mother’s Day so she can use it on her phone as her timer ringtone (I have my own personalized timer ringtone that my daughter composed and I love it!) or as a birthday gift for grandpa. It is a really special way for students to use their musical knowledge and creativity to brighten the lives of the people they love.

Although are were a lot of pictures in this step-by-step walk-through, it is a very simple process. Every time I record my students (we make a recital Cd every year as well as a composition Cd when we have a studio-wide composing project), I teach them how to do basic editing with GarageBand and how to navigate it. As far as music production softwares go, it is very easy to use and a great starting point for kids (and us teachers who don’t want adventure into the music production world – me included!).

If the kids want to explore GarageBand beyond just playing their composition:

  • they can create their own beat to play under their composition (a great exercise for working with rhythms!)
  • create lyrics for their composition and then record themselves singing (for all our budding singer-songwriters!)
  • if they play another instrument, they can accompany themselves (a great way to have them start thinking about harmonizing with other instruments and creating layers to a piece of music)

the sky is really the limit for their creativity on this project! And the beauty of it is that since it is a short composition (a maximum of 40 seconds), they can try out many different things!

I am going to explain my process for an iPhone/iPad (I don’t have an Android…) and digital piano (you could also record your students playing an acoustic piano by setting up a microphone connected to your device).

After your student has composed their ringtone composition, it’s time to record! Open up GarageBand on your iPhone or iPad and click on the + symbol in the top right corner:

Select “Keyboard” (for a digital piano set up) or “Audio Recorder” (for an acoustic piano and microphone set up):

If you do not want the metronome ticking while your student records, tap the metronome symbol to turn it off.

Tap on the + symbol in the upper right hand corner:

GarageBand automatically limits the number of measures to 8. To record to the end of a piece without worrying about getting cut off after 8 measures, tap on the arrow next to the text “8 bars”:

Then toggle the slider to green. GarageBand will now continue to record until you tell it to stop. Tap on “Done” (top right corner) to return to the keyboard screen.

Connect your digital piano (or microphone) to the iPhone/iPad:

Press the record button and have your student play his/her composition:

Tap the square icon to the left of the record icon to stop recording when your student is done playing:

If there is no editing to be done, tap on the arrow in the top left corner and select “My Songs” to save and return to the main page:

Your student’s composition will be automatically named “My Song #”.

You can rename it by pressing and holding the keyboard and selecting “Rename”. Type in the name of the composition.

The easiest way to create a ringtone without having to install any apps or connect the iPhone/iPad to iTunes is to share the composition as a “Project” and send it to the recipient. They will then open it in GarageBand (which is free and comes with all iPhones/iPads) to create the ringtone.

Another option for sharing the would be to share it as an “Song” and send it as a .wav file. If the recipient has an Android they can use that .wav file directly and set it as a ringtone. However, if the recipient has an iPhone they will have to convert the .wav file to a .m4r file.

I’m going to explain how to share the composition as a “Project” and what the recipient needs to do once they receive it. To share with a parent/guardian/relative/friend, press and hold the keyboard icon above the name of the composition and select “Share”:

Select “Project”:

A menu will pop up asking you how you would like to share the file. Choose whichever option best suits your needs (Google Drive, e-mail, text message, etc.) and send it the student’s parent/guardian/etc.:

When your student’s parent/guardian/etc. receives the file, they can open it in Garageband. It will appear in GarageBand’s main menu.

They will press and hold the keyboard icon above the name of the composition and select “Share”:

They will then select “Ringtone” in the menu that appears:

They will then choose how they would like to set their ringtone:

The ringtone will now appear as an option with all their other ringtones!

I hope your students have fun with this little composition project!

Let’s stay in touch, join the list!

As a “toucan” of our appreciation download a free set of note flashcards (link in our Welcome email)!

Processing…
Success! You're on the list.

Musical Madness

I think as teachers we all wish our students listened to more music, especially piano music. I assign listening homework every now and then and, before Covid, we would do a Composer of the Month (we would spend that month learning about a specific composer’s life, the period he/she lived in, and his/her music). We put “Composer on the Month” on hiatus while we were all virtual because of the logistics of getting the print-outs to everyone (it was a lot of stuff). But since resuming in-person lessons, I’ve found out that the kids really miss it and want to bring it back… and this is where March’s Musical Madness comes in!

I have so many students who love to play basketball so I decided to jump on the March Madness bandwagon and do a little competition of our own. Over the next month and a half we are going to be embarking on weekly showdowns between two great composers of classical music to see who will come out on top and be our first “Composer of the Month” of 2022! We will also have our first piano party since 2019 to celebrate the end of Musical Madness!

I chose to focus on the Romantic composers (because my brain hurt when trying to narrow all of the classical periods down to 8 composers!), more specifically Chopin, Liszt, R. Schumann, Brahms, Felix Mendelssohn, Fanny Mendelssohn Hensel, Dvořák, and Rachmaninoff. Other groups of composers I thought of focusing on were female composers, impressionist composers, and living composers… I feel I will definitely be revisiting these groups in the future for other music appreciation events.

Musical Madness: Romantic Composers. (All composer portraits were found on Google. Some of the portraits are by artist Hadi Karimi. You can check out his amazing series of portraits of classical composers at https://hadikarimi.com/ )

I made a frame for the portraits of the composers I chose so that they would resemble basketball cards (do kids still collect cards??). And then I wrote their names in the brackets of our Musical Madness poster.

Each week two composers will face off to see who will make it to the next round. At my lessons I will give a quick introduction to that week’s composers to spark my students’ curiosity. Then I will send an email to all my piano families with one piano piece by each of the composers (I try to keep each piece under 5 minutes). My students will listen to the pieces at home and choose their favorite between the two. At their next lesson, they will give their vote to their favorite. The composer with the most votes moves on to the next round and the loser is out. Our first showdown is between Sergei Rachmaninoff and Antonín Dvořák!

I’m just glad I’m not the one voting… this is really hard!

I taped the composer cards to the poster so I can swap them out each week. The composers waiting to jump into the competition are taped to the wall next to the poster. I’m very excited to see which composer will take it all!

If you would like to play your own version on Musical Madness and bring some beautiful music into your students’ homes, the poster and blank composer cards are available in the Toucan Piano Shop. I made three different poster sizes (with cards that fit each size) to best fit your needs: letter size (if you want to print it out for each of your students to have their own copy), 12″ x 18″, and 18″ x 24″. All three sizes come with your purchase. I hope you have as much fun as we are having!

Let’s stay in touch, join the list!

As a “toucan” of our appreciation download a free set of note flashcards (link in our Welcome email)!

Processing…
Success! You're on the list.

I Can Heart-ly Wait for the Punchline!

Valentine’s day is a month-long affair at my studio! As I tell my students, it’s a holiday that celebrates pink, I need to milk it for all it’s worth.

We’ve played a few different note-reading games this month and this one in particular had me giggling long after I had memorized all the punchlines for the jokes. It was so much fun to introduce a lot of my students to music theory jokes. From puns to just plain silly jokes, it was so funny to see the wide range of expressions on their faces when they “got” it (most called them “Dad jokes” but they laughed all the same! Because Dad jokes are hilarious!).

I wanted to go all out with this game so that it would be a decoration for my studio space as well as a game (I’m also sharing an easier way to play it up below). I wanted my student to be curious about it when they walked in. I cut out hearts and folded them in half; on the outside was a note on the staff and on the inside was a letter of the alphabet. Here is a reel I posted of how I made them:

I loved the way it turned out!!

To play, I had my students randomly pick a joke:

I would have them read the setup of the joke and then I’d explain that the punchline is written out as a series of colored rectangles that they have to decode. Each color corresponds to a key on the keyboard picture. We would then pick a color and find the key on the keyboard printout (for example, blue is Middle C). Then they had to find that note on my wall of hearts to reveal the letter that goes in the punchline.

They would then write that letter inside the colored rectangle.

Once all the notes had been found and all the colored rectangles had been filled in, they would tell me their joke!

Here is another reel of me playing this game with a student:

I love this game because not only do students have to think about keyboard geography, they have to be able to associate the notes with their exact location on the piano. A tip I always started with was, “Look at the clef first!” because often they would find the correct line or space but the clef was wrong. They caught on quickly!

I have this game available in my shop: I Can Heart-ly Wait for the Punchline. It comes with 10 jokes for students to decode as well as all the hearts. The hearts are double-sided, one side has the note and the other, the letter of the alphabet, so set-up is much easier. I would love to hear what you think if you decide to play this game with your students! We had a blast!

Let’s stay in touch, join the list!

As a “toucan” of our appreciation download a free set of note flashcards (link in our Welcome email)!

Processing…
Success! You're on the list.

Musical MASH: A Note Reading Game that Predicts the Future

Did you play MASH (Mansion, Apartment, Shack, House) when you were a kid? All it required was a piece of paper and a pencil! My friends and I would spend countless recesses trying to find out if we would marry our crushes, have 20 kids while living in a mansion (we all wanted the mansion, of course) and driving a Ferrari! It was loads of fun and provided a lot of good laughs! If you want to check out the original game, MASH+ has all the details.

This Valentine’s Day my students and I are playing the musical version of MASH (maestro, accompanist, soloist, hobbyist) that I created! We will be drilling our knowledge of the spaces on the grand staff while figuring out our musical futures!

It’s a fast, easy game to play, and has already given us some funny results! I am using a print-out of the grand staff and some mini-erasers in my example here but it could also be played with a floor staff and beanbags or at the piano (see the instructions in the download for details).

First have the student fill out the four spaces for each category. You can ask them to name the spaces of the grand staff as they write their answers in each space.

Hand them some mini-erasers (I’m using heart shaped ones for Valentine’s Day!). They should close their eyes while dropping the erasers onto the grand staff. They can drop them one by one or a few at a time (the teacher can call out when an eraser has landed on a space).

When they open their eyes they evaluate if any of the erasers landed on the spaces of the grand staff (for added drilling, you can have them name all the lines and spaces that the erasers landed on).

They then take note on the Musical MASH worksheet of where the erasers landed. Repeat the same procedure until the student has obtained an answer in all four categories.

In order to decide if the student will be a Maestro, Accompanist, Soloist, or Hobbyist, you can roll a die (for example, 1 = Maestro, 2 = Accompanist, 3 = Soloist, 4 = Hobbyist, 5/6 = Roll again) or use the traditional MASH spiral method (explained at MASH+). Circle their future career at the top of the page, under the title.

The student should then fill in the blanks at the bottom of the page with the answers to their future!

If you would like to play Musical MASH with your students, download it for free at the new Toucan Piano Shop! I am currently setting up the shop with new products, so if you are interested in staying up-to-date with the latest blogposts and shop updates, join the email list below (no spam, I promise!).

Let’s stay in touch, join the list!

As a “toucan” of our appreciation download a free set of note flashcards (link in our Welcome email)!

Processing…
Success! You're on the list.