

Birthdays are really important to kids, they care A LOT about how old they are and get really excited counting down the days until their next birthday.
One way I like to celebrate my younger piano students’ birthdays is by giving them a special Piano Birthday Crown! It’s quick to make (less than 5 minutes!) and it makes them feel so special!
The bottom band of the crown comes in three colors (blue, pink, and purple) and it includes the melody of “Happy Birthday” in the key of F major. Not only is it a special way to celebrate your student’s birthday but you can use it to teach them how to play “Happy Birthday” on the piano during their lesson!
Preparing the Piano Birthday Crown:
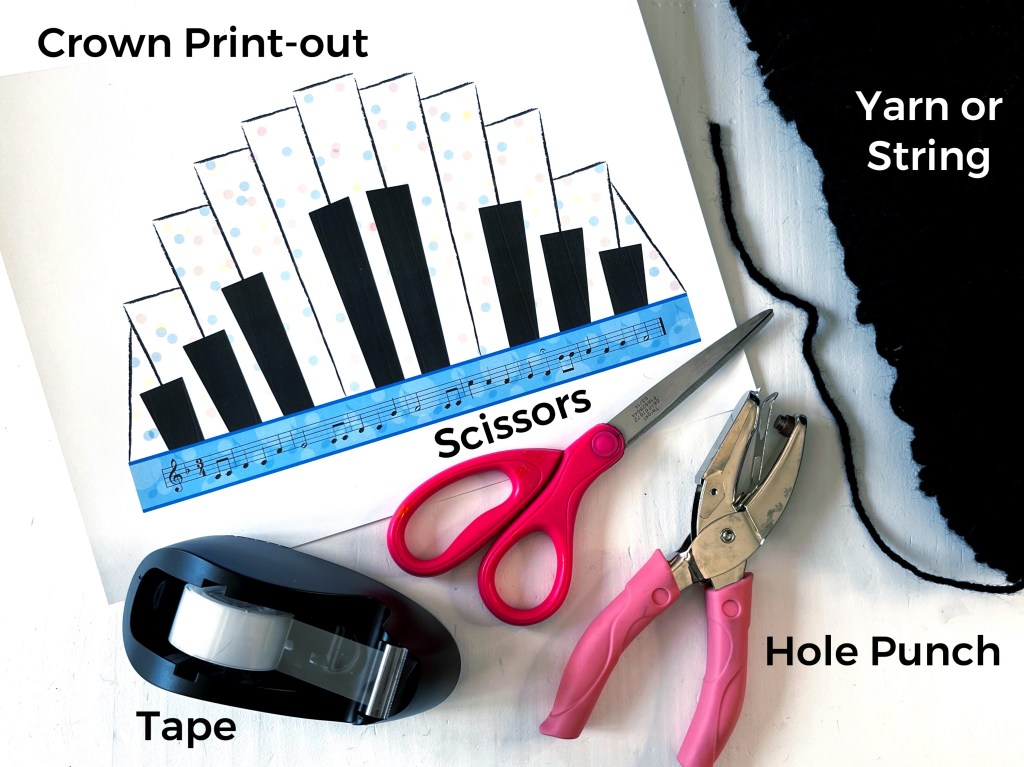
All you need to make a piano birthday crown is:
- Print out the piano birthday crown on a sheet of cardstock (it will sit more firmly on your student’s head than regular copier paper)
- Scissors (I like the Westcott brand a lot. My pair is still going strong after more than 10 years!)
- Hole punch (I do a lot of crafting so I like the soft grip handles on my hole punch)
- Yarn or string
- Optional: Transparent tape (I use this for everything)
Print out the piano birthday crown on a sheet of cardstock and cut it out.
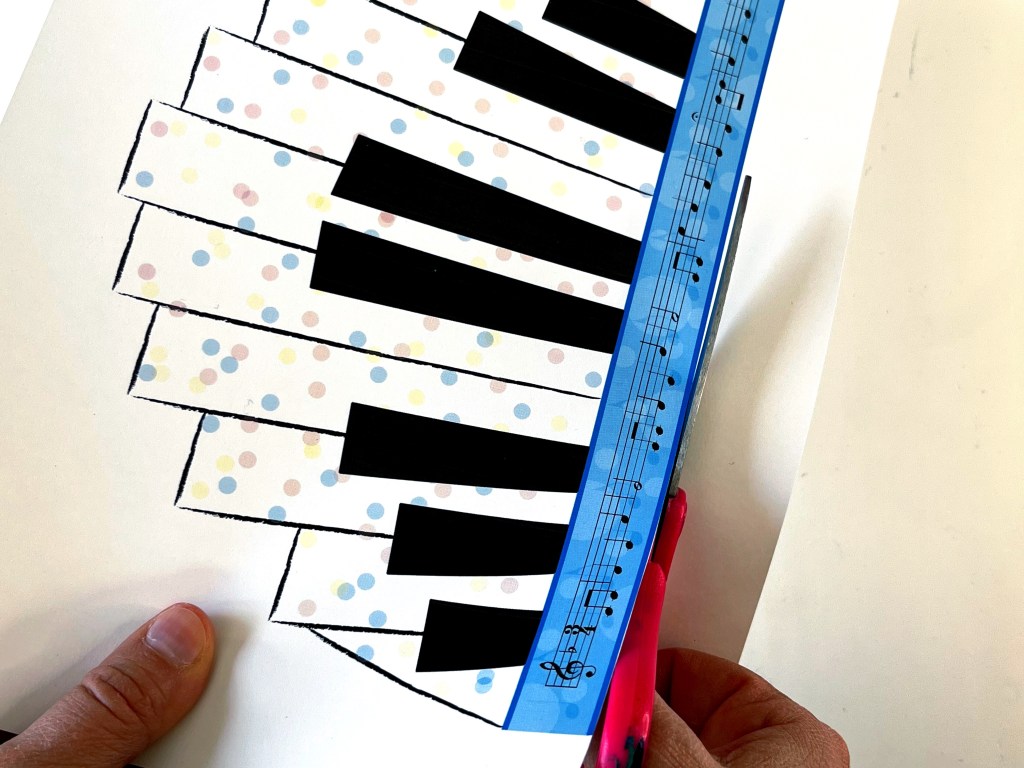
This part is optional, but I like to reinforce the edges of the colored “Happy Birthday” band with a little bit of tape. This is the spot where we will be punching a hole through the crown, so the tape provides the paper with a little extra strength to support the tension of the yarn once it is tied around your student’s head.

Punch a hole on each ends of the colored “Happy Birthday” band through the paper and the tape.

Cut two pieces of yarn or string to size. Thread the yarn/string through the holes.

Tie a knot to secure the yarn/string to the crown.

And there you go! An adorable piano birthday crown for your piano student.
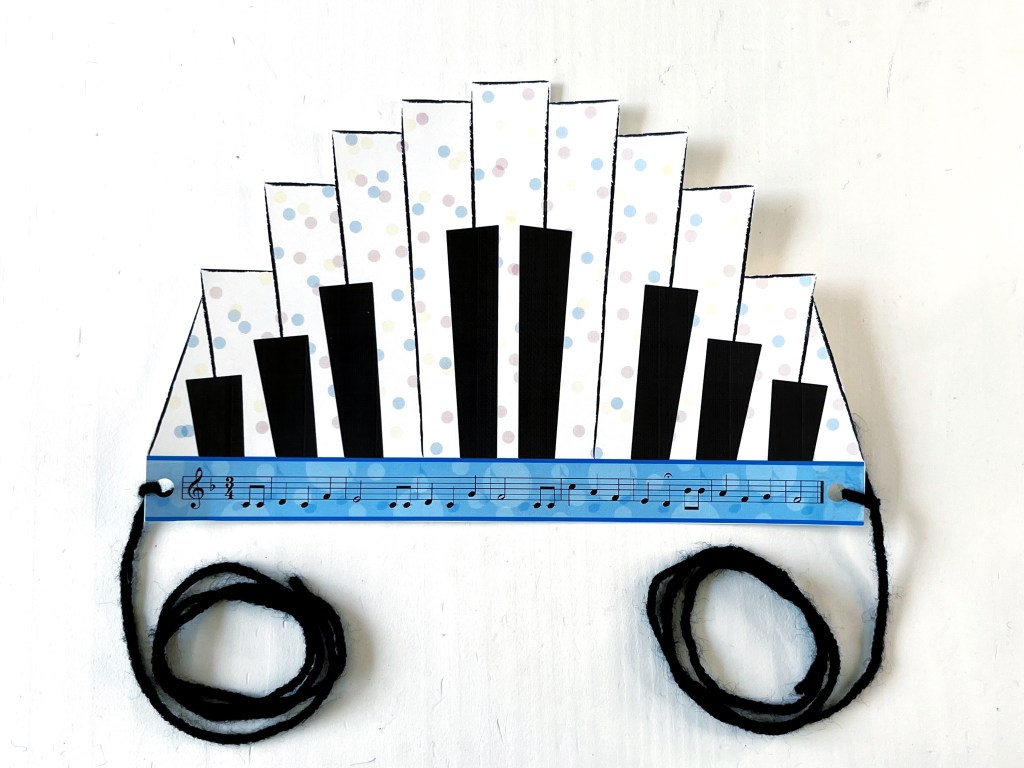
Just place the crown on your student’s forehead and tie a bow at the back of his/her head with the yarn. Time to play some “Happy Birthday” on the piano!!!
You can purchase and download the piano birthday crown at the Toucan Piano shop. You can print as many crowns as you’d like, so you can use it for any student you teach directly for years to come! I hope your students enjoy this cute crown as much as mine do!

- Rainbow Manuscript Paper
This colorful manuscript paper is available in the Toucan Piano shop as a free printable! They are available in three sizes, so they can be used for a variety of ages and activities, like writing out original compositions, explaining music theory concepts, music dictation, games, and so much more! - Musical M.A.S.H.
This free printable game tests your student’s knowledge of the spaces on the grand staff. It’s a fast, easy game to play, and will predict your student’s musical future with hilarious results!

Let’s stay in touch, join the list!
As a “toucan” of our appreciation download a free set of note flashcards (link in our Welcome email)!
We are a participant in the Amazon Services LLC Associates Program, an affiliate advertising program designed to provide a means for sites to earn advertising fees by advertising and linking to Amazon.com. As an Amazon Associate we earn from qualifying purchases.

Published by